In Commerce Studio’s settings, you can configure what the Editor displays for each search profile.
Some of these settings require the names of data fields in Fusion, but you can type to search for the fields you need.
In your site on Lucidworks Platform, navigate to Commerce Studio > Settings to access these settings.Start by selecting a search profile to configure.
Search profiles represent different predefined search results that you can display on different pages of your customer-facing site, such as new items, seasonal items, sale items, and so on.
You might also have experimental search profiles for testing different configurations.
The configuration you create here determines how the item cards are displayed in the Editor when the same search profile is selected.
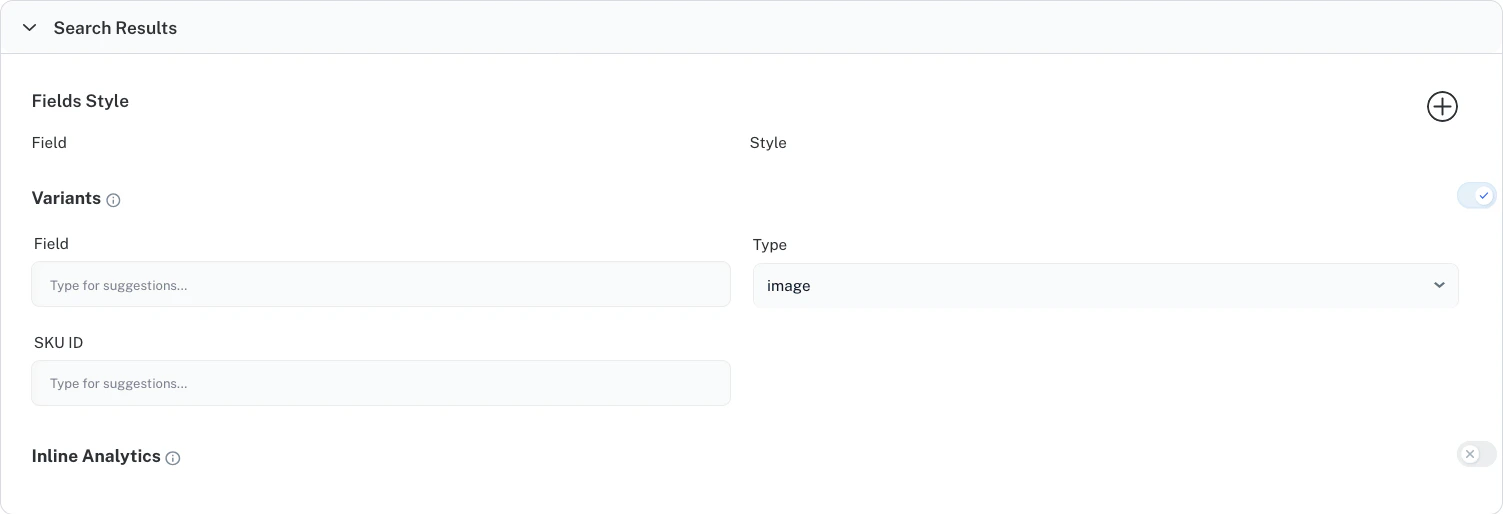
In the Search Results section, you can configure the fields displayed for each result item in the Editor.
Once you configure these settings, you can turn different display fields on or off while you’re working in the Editor using its Preview Settings.
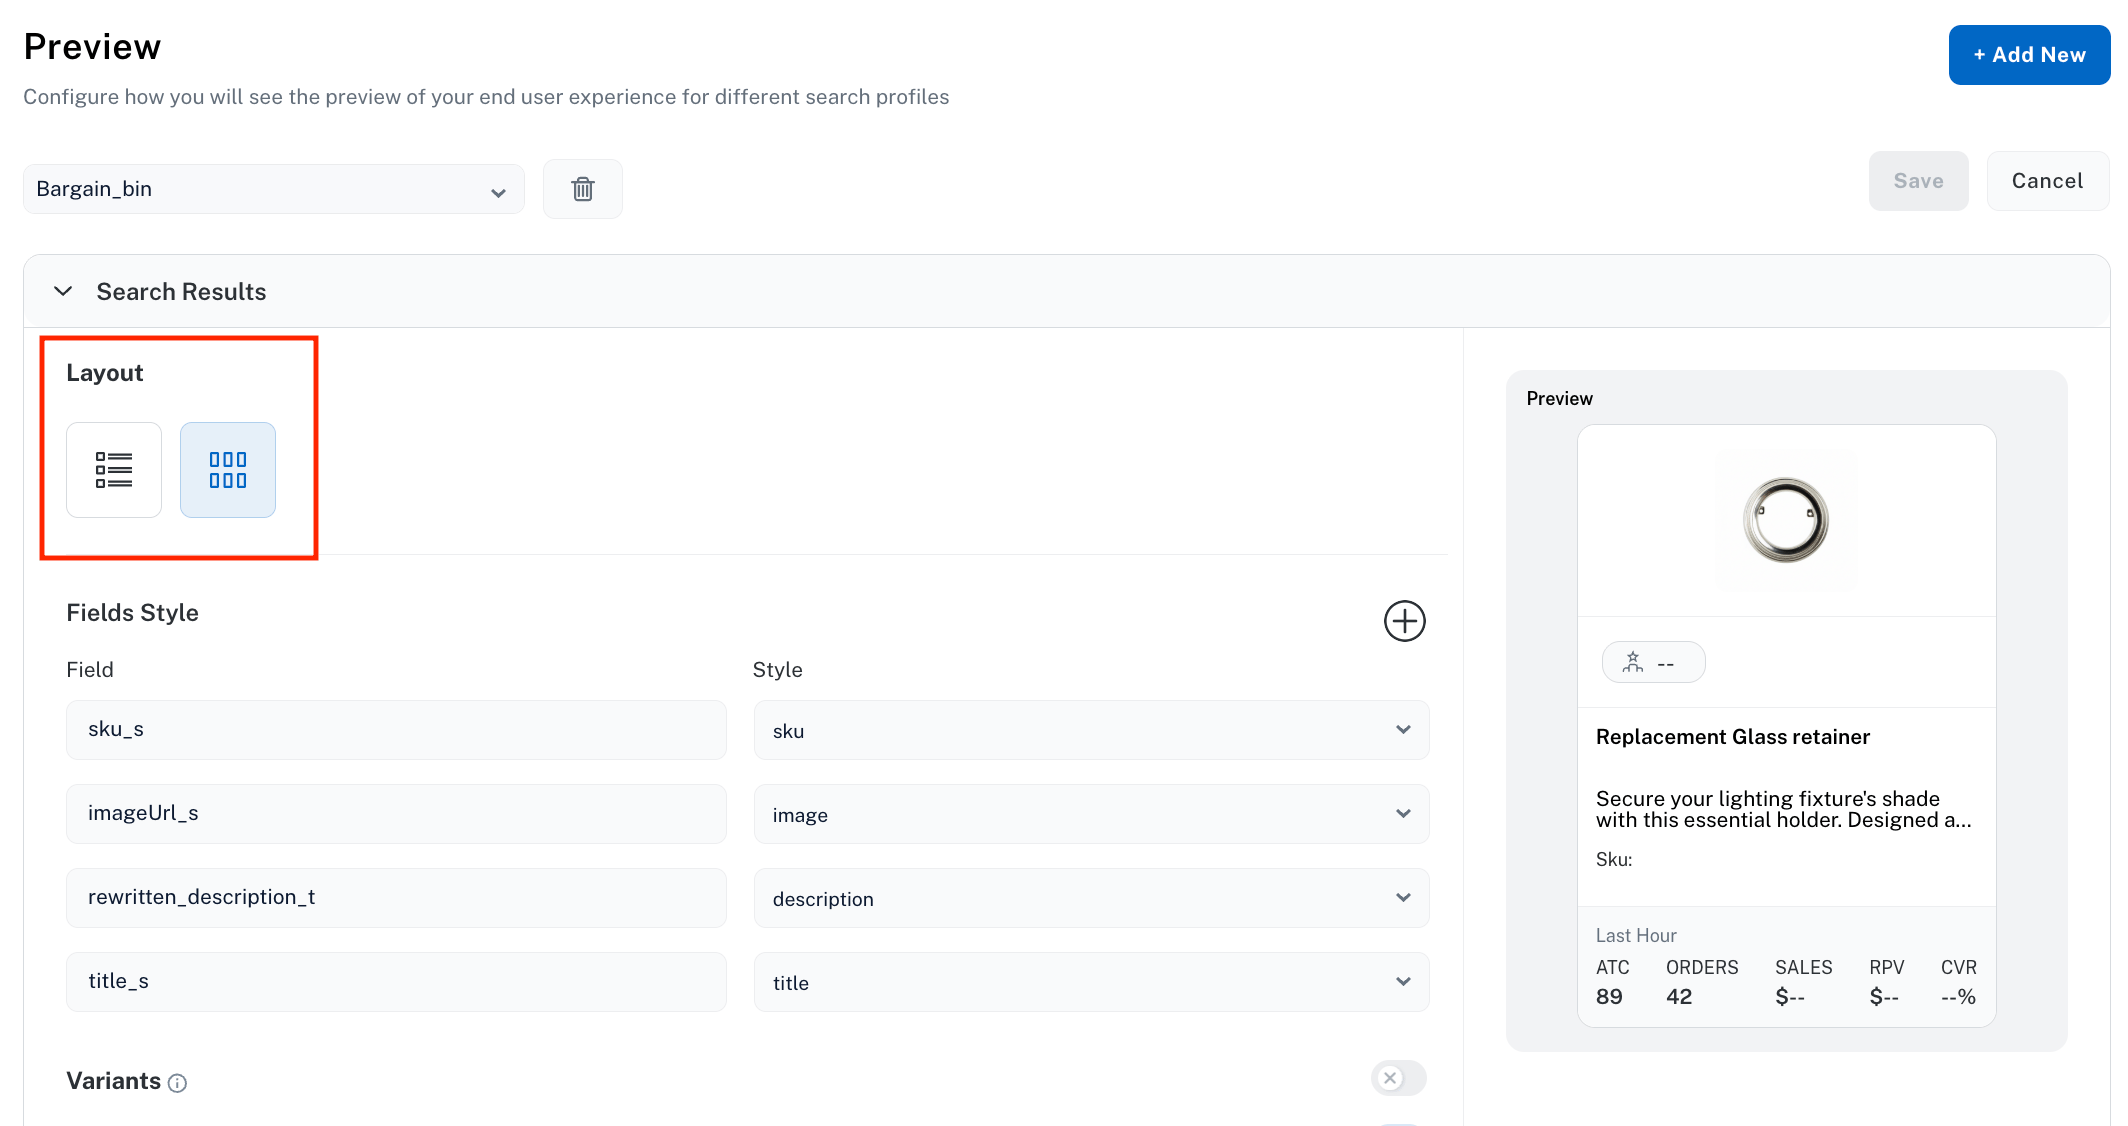
The Layout section lets you select to display search results in a vertical list or a grid pattern.
Select the option you want, click Save, and then verify the list displays on the Editor screen.This demo explains the Layout options and how each displays search results.
When you enable Variants, you can select the fields that contain data about different variants of your products. To enable product grouping in Commerce Studio, follow the procedure for your configuration.
Fusion
Core Settings
If you are using Fusion, configure grouping in your query pipeline. Then, configure grouping in Commerce Studio.
1
Open your query pipeline
In Fusion, open the query pipeline for which you want to configure grouping.
2
Add query parameterss
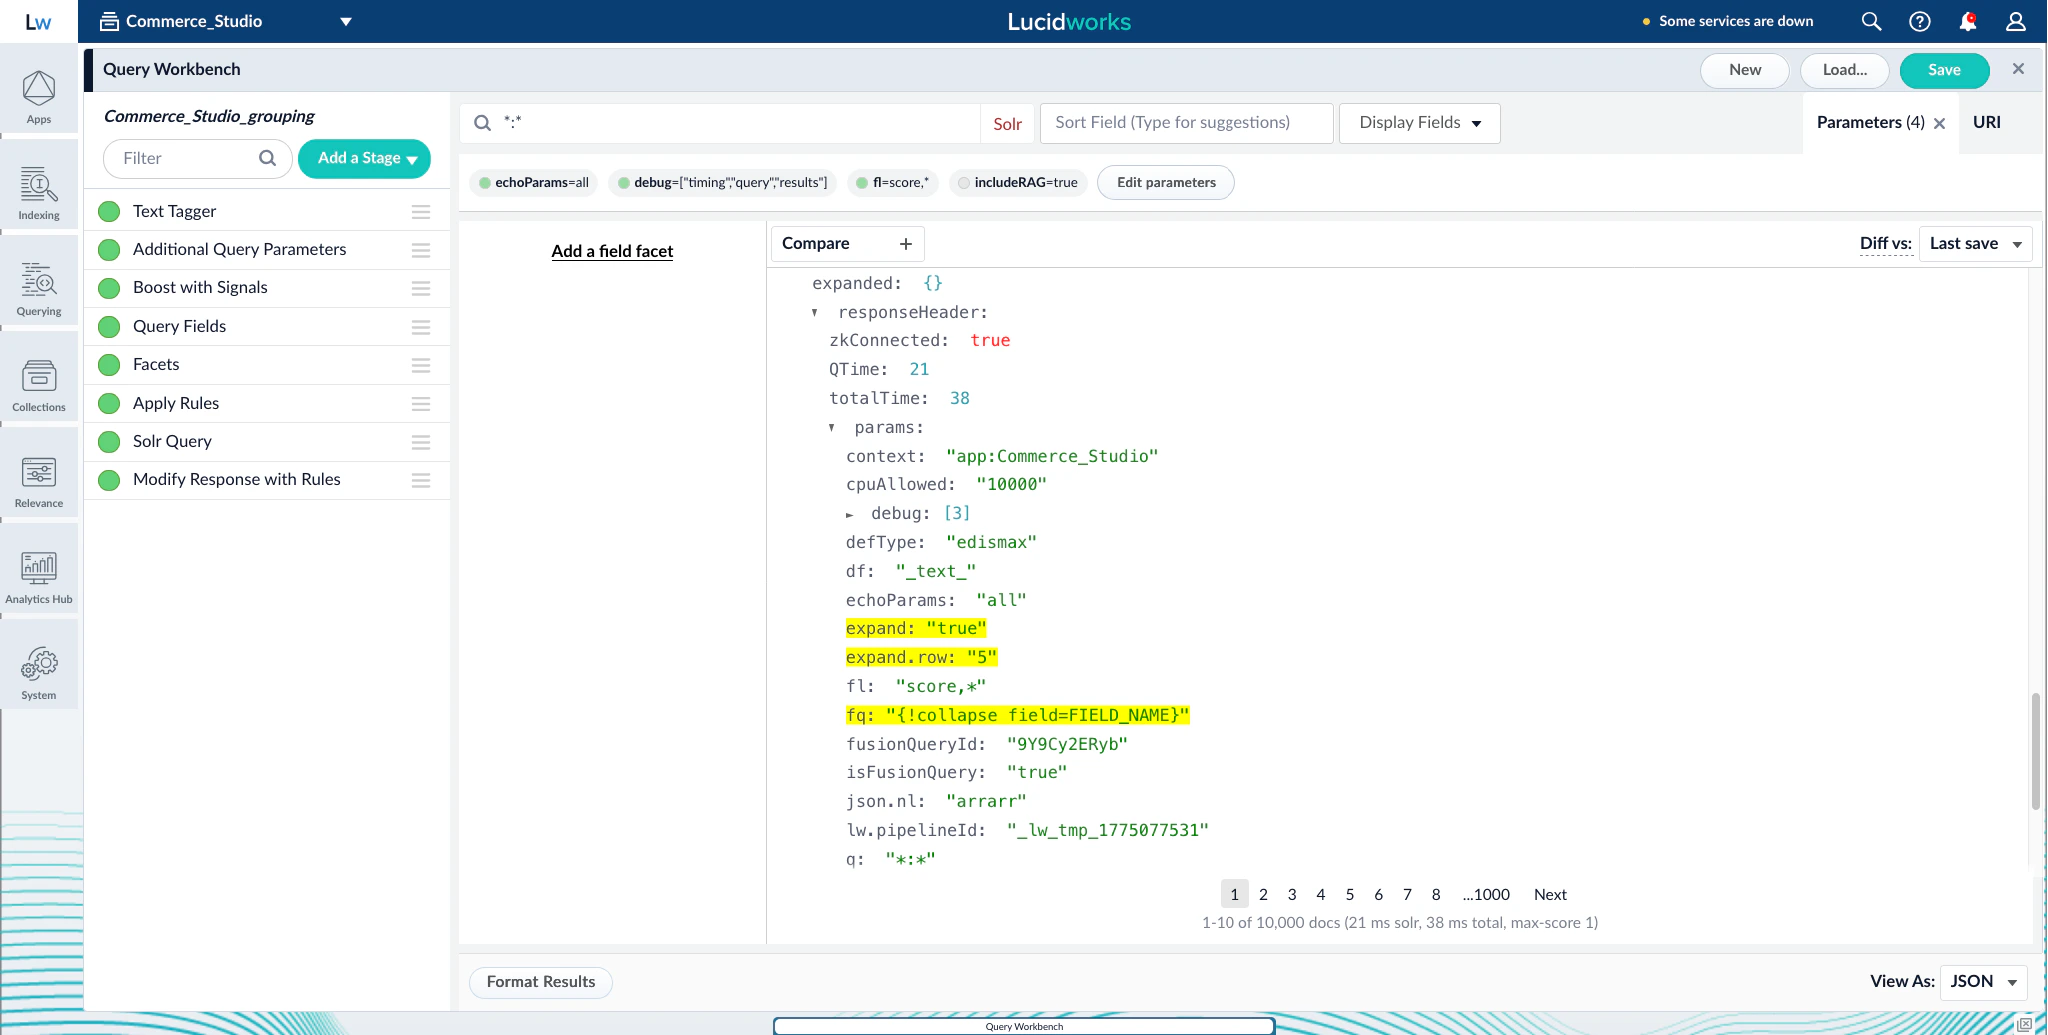
The query profile must pass a fq, expand, and expand.rows query parameters.
Add a new Additional Query Parameters pipeline stage or edit an existing one.
The number of variant swatches displayed on each product card in Commerce Studio. For example, 5 displays 5 variant swatches on the product card. All variants are included in the response regardless of this value. This parameter must be set in Fusion or in the same Set Parameter Rule as the collapse parameter.
Save the pipeline stage and pipeline configuration.
Verify that your query pipeline passes the query parameters you set up in previous steps. In the query workbench, open the View As selector and select JSON. Navigate to responseHeader.params in the response.
Query parameters in the response JSON
Setting a parameter requires proper Solr syntax. If you receive errors in Commerce Studio after completing these steps, verify that you set up these parameters correctly.
3
Configure Commerce Studio
Go to Commerce Studio > Settings and configure these options:
The Fusion field containing visual data (image path or color) used for variant swatches on the product card. This information is used for visual display purposes only.
Specifies whether the variant field name contains an image or color, determining which type of swatch Commerce Studio displays. This information is used for visual display purposes only.
The field containing IDs of individual products collapsed into a single group in the Editor. This information is used for visual display of variant swatches and for creating rules to rerank products within the group.
These configurations determine how products with variants are visualized in the Editor.
4
Verify your settings
Save your changes, then visit the Editor to verify that items are correctly grouped.
If you are using Core Settings, enable product grouping in the Lucidworks Platform UI.
1
Turn it on
Go to Core Settings > Relevance and turn on Product Grouping:
Product Grouping toggle in Core Settings
2
Configure Commerce Studio
Go to Commerce Studio > Settings and configure these options:
Specifies whether the variant field name contains an image or color, determining which type of swatch Commerce Studio displays. For visual display purposes only.
The field containing IDs of individual products collapsed into a single group in the Editor. This information is used for visual display of variant swatches and for creating rules to rerank products within the group.
3
Verify your settings
Save your changes, then visit the Editor to verify that items are correctly grouped.
For conditional, rule-based grouping that can vary based on queries, categories, or other conditions, see advanced grouping in the Rules documentation.
When you configure and use the signals beacon and Analytics Studio to collect and display signal information, you can also enable Inline Analytics in Commerce Studio Settings, which lets you select the metrics to display in Commerce Studio Editor search results cards.
Enable Commerce Studio Impressions metrics
To enable metrics to display in Commerce Studio, complete the following steps:
Navigate to Inline Analytics and click the toggle on.
IMPORTANT: This setting is required to display the Metrics option in Commerce Studio Editor Preview Settings. If the toggle is off, you cannot display any metrics on search results cards in Commerce Studio Editor.
Commerce Studio Setting enablement for Inline Analytics Metrics
Select a default option in the Metrics Duration field. This is the default duration for the Commerce Studio Editor Preview Settings Metrics section. Options include Last Hour, Last 24 Hours, Last 7 Days, Last 30 Days, and Last Year.
The timeframe selected in the Metrics Duration field is the default. But you can override this duration by selecting a different timeframe in Commerce Studio Editor Preview Settings Metrics.
In the Document ID Field, enter the name of the search result document field used as the document ID when retrieving metrics from the Signals Store. The default is id.
This is the Solr field that corresponds to the product identifier that your signals beacon logs for each item. The default value of id matches the Solr uniqueKey for most catalogs. However, use the value your catalog uses. Another example of the value used is sku_s.
This value is used to calculate the search result’s Impressions, ATC,
Orders, Sales, RPV, and CVR data on the result card.
If the Document ID Field doesn’t match what your signals beacon records as the product identifier, the metrics cannot be calculated and a -- placeholder displays on the result card.
Optionally, if you want to build a preview of how metrics display on the search result card before you deploy it in Commerce Studio Editor, you can select the metrics checkboxes for Impressions, Add-To-Cart (ATC), Orders, Sales, Revenue Per Visit (RPV), and Conversion Rate (CVR).In this example, all of the checkboxes except Impressions are checked, and the Settings Preview Result Card indicates how that displays:
IMPORTANT: When you select these options, they only display on the Preview result card in Commerce Studio Settings. To select metrics to display on search result cards in Commerce Studio Editor, you must navigate to Commerce Studio Editor > Preview Settings > Metrics and select metrics options. For detailed information, see Commerce Studio Editor Impressions metrics.
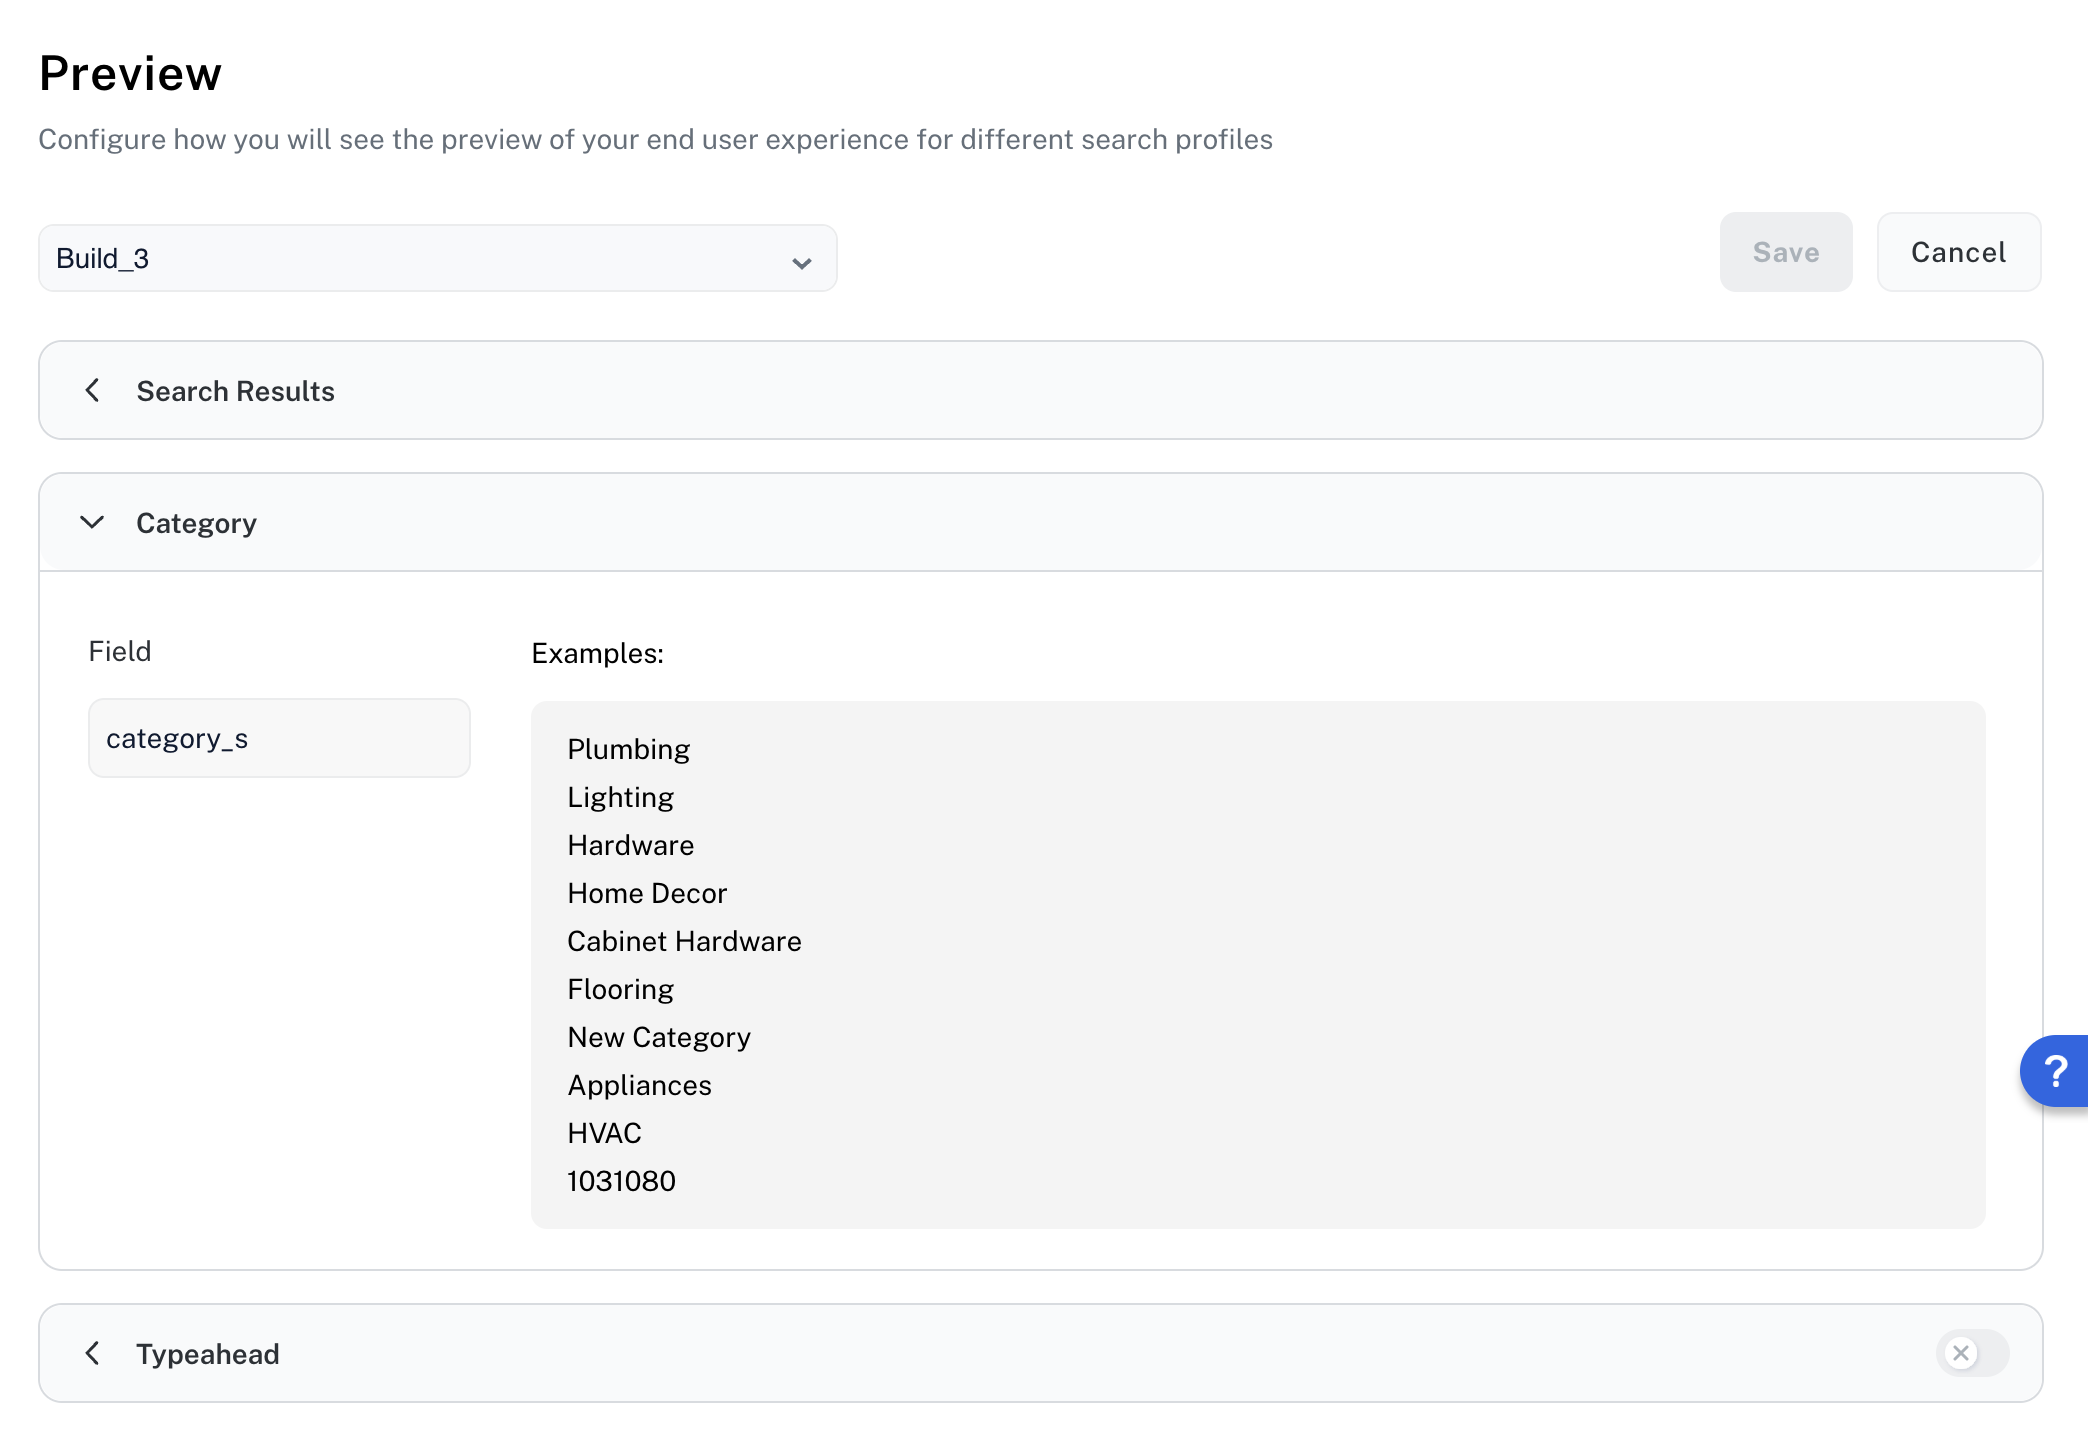
In the Editor, you can create and manage rules that apply within specific categories of items in your catalog.
To enable category-level search optimization in the Editor, you need to set the category field here.Type to search for the data field that contains your site’s categories, such as category_s.
When you select a field, this section displays example values found in that field so you can verify that the field you selected contains the data you need.
Once you’ve selected the category field here, you can use category conditions in the Editor to access the available categories and optimize the results for each one.
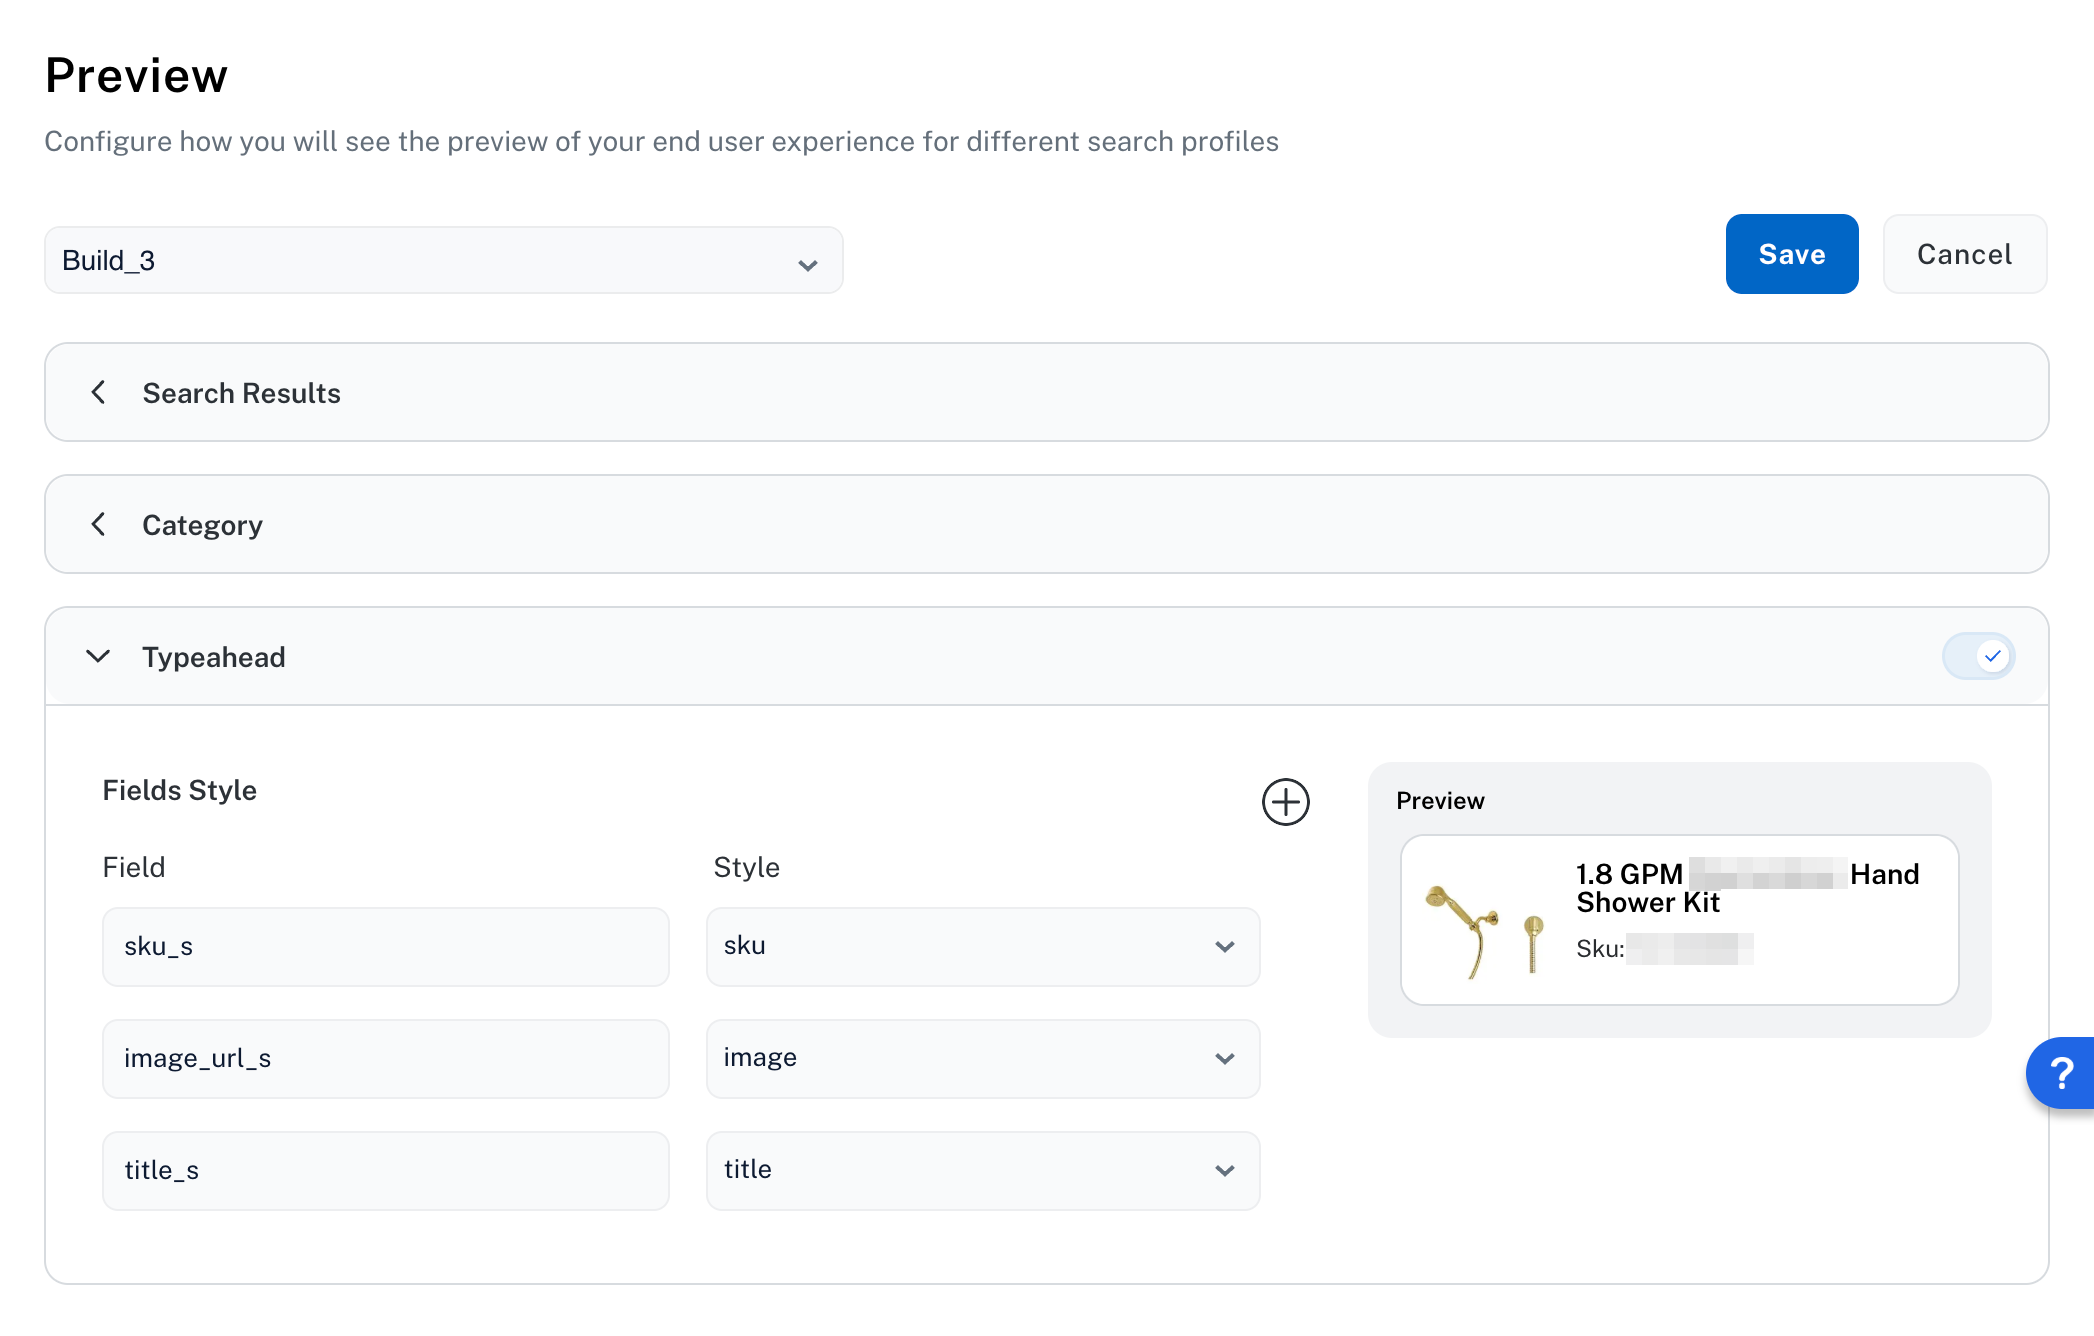
Typeahead, also known as autocomplete or autosuggest, is a feature that provides real-time query and phrase suggestions as you type in the Editor’s search bar.
In the Typeahead section, you can configure the fields to use for typeahead for this search profile.
To add a field, click the button.
To change a field, click the field and type to search for another one.
To change a field’s display style, click the dropdown and select the style that best matches the field’s data type.
The Commerce Studio Settings Typeahead feature is for internal use in Commerce Studio. This is different than the Lucidworks Platform Core Settings Typeahead feature, which is where typeahead options for customer queries is configured.





 IMPORTANT: When you select these options, they only display on the Preview result card in Commerce Studio Settings. To select metrics to display on search result cards in Commerce Studio Editor, you must navigate to Commerce Studio Editor > Preview Settings > Metrics and select metrics options. For detailed information, see Commerce Studio Editor Impressions metrics.