

This feature is only available in Fusion 5.9.x for versions 5.9.14 and later.
- You want to use chunking in your Fusion search strategy with an external chunking solution.
- You are comfortable setting up your own Ray Serve environment or using Fusion’s Ray image.
- You cannot use the LWAI Chunker Index Stage, which uses Lucidworks AI to break down large text documents.
Develop and deploy a chunking machine learning model with Ray
Develop and deploy a chunking machine learning model with Ray
This feature is only available in Fusion 5.9.x for versions 5.9.14 and later.
Prerequisites
- A Fusion instance with an app and data to index
- An understanding of Python and the ability to write Python code
- Docker installed locally, plus a private or public Docker repository
-
Ray installed locally:
pip install ray[serve]using the version of ray[serve] found in the release notes for your version of Fusion. - Code editor; you can use any editor, but Visual Studio Code is used in this example
- Model: Snowflake/snowflake-arctic-embed-xs
- Docker image for chunking on indexing: ray-chunking-snowflake-arctic-embed-xs
- Docker image for chunking on querying: ray-snowflake-arctic-embed-xs
-
The chunking query parsers are added to your
solrconfig.xmlfile, if not present: -
The vector definitions are added to your
managed-schema.xmlfile. See Vector definitions for the full definitions. -
The collection must have a processor component added to the Solr schema:
<processor class="solr.lw.MultiVectorsToChildDocsProcessorFactory" />. Here is an example of a default in thesolrconfig.xml. After you add this, you must clear the collection and re-index.
Tips
- Always test your Python code locally before uploading to Docker and then Fusion. This simplifies troubleshooting significantly.
-
Once you’ve created your Docker you can also test locally by doing
docker runwith a specified port, like 8000, which you can thencurlto confirm functionality in Fusion. See the testing example below. -
If you run into an issue with the model not deploying and you’re using the ‘real’ example, there is a very good chance you haven’t allocated enough memory or CPU in your job spec or in the Ray-Argo config.
You can increase the resources. To edit the ConfigMap, run
kubectl edit configmap argo-deploy-ray-model-workflow -n <namespace>and then find theray-headcontainer in the artisanal escaped YAML and change the memory limit. Exercise caution when editing because it can break the YAML. Just delete and replace a single character at a time without changing any formatting. For additional guidance, see the testing locally snowflake-arctic-embed-xs_chunking-ray example.
Intro to Machine Learning in Fusion
The course for Intro to Machine Learning in Fusion focuses using machine learning to infer the goals of customers and users in order to deliver a more sophisticated search experience.
Local testing example
-
Docker command:
-
Curl to hit Docker:
- Curl model in Fusion:
-
See all your deployed models:
-
Check the Ray UI to see Replica State, Resources, and Logs.
If you are getting an internal model error, the best way to see what is going on is to query via port-forwarding the model. TheMODEL_DEPLOYMENTin the command below can be found withkubectl get svc -n NAMESPACE. It will have the same name as set in the model name in the Create Ray Model Deployment job.
Download the model and choose a chunking strategy
This tutorial uses the Snowflake/snowflake-arctic-embed-xs model from Hugging Face, but any pre-trained model from huggingface.co works with this tutorial.For the chunking strategy you can start with LangChain or LlamaIndex.If you want to use your own model instead, you can do so, but your model must have been trained and then saved though a function similar to the PyTorch’storch.save(model, PATH) function.
See Saving and Loading Models in the PyTorch documentation.Create the index model
The next step is to format a Python class which will be invoked by Fusion to get the results from your index model. The skeleton below represents the format that you should follow. This is distinct from the standard example without chunking because the format to output is more complex.The model’s return value must be a dictionary with a key namedresponse. The value associated with this key must be a JSON string. When parsed, this JSON string is a dictionary that contains two primary keys:spans: A list of lists, where each inner list represents[start_index, end_index]pairs for each text chunkvectors: A list of dictionaries. Each dictionary in this list must have a key namedvector, and the value is a list of numbers representing an embedding vector with the shape of (1, DIM), where DIM (vector dimension) is a consistent integer. This format is required for the Local Chunker Index Stage to handle the vector encoding.
snowflake-arctic-embed-xs model is as follows:NOTE: This code pulls from Hugging Face. To have the model load in the image without pulling from Hugging Face or other external sources, download the model weights into a folder name and change the model name to the folder name preceded by ./.-
__call__This function is non-negotiable. -
__init__The__init__function is where models, tokenizers, vectorizers, and the like should be set to self for invoking. It is recommended that you include your model’s trained parameters directly into the Docker container rather than reaching out to external storage inside__init__. -
mainThemainfunction is where the field or query that is passed from Fusion to the model is processed. Alternatively, you can process this in thecallfunction but it is cleaner not to. Themainfunction can handle any text processing needed for the model to accept input invoked in itsmodel.predict()or equivalent function which gets the expected model result.
response. The value associated with this key must be a JSON string. When parsed, this JSON string is a dictionary that contains two primary keys:spans: A list of lists, where each inner list represents[start_index, end_index]pairs for each text chunkvectors: A list of dictionaries. Each dictionary in this list must have a key namedvector, and the value is a list of numbers representing an embedding vector with the shape of (1, DIM), where DIM (vector dimension) is a consistent integer. This format is required for the Local Chunker Index Stage to handle the vector encoding.
Use the exact name of the class when naming this file.
In the preceding example, the Python file is named
deployment.py and the class name is Deployment().Create a Dockerfile
The next step is to create a Dockerfile. The Dockerfile should follow this general outline; read the comments for additional details:Create a requirements file
Therequirements.txt file is a list of installs for the Dockerfile to run to ensure the Docker container has the right resources to run the model. For the snowflake-arctic-embed-xs model, the requirements are as follows:<RAY_VERSION> with any ray[serve] version.
Fusion doesn’t require a specific version; the version listed under “Platform support and component versions” in the release notes for your Fusion version is the one Lucidworks has tested.
In general, if an item was used in an import statement in your Python file, it should be included in the requirements file.To populate the requirements, use the following command in the terminal, inside the directory that contains your code:Build and push the Docker image
After creating thedeployment.py, Dockerfile, and requirements.txt files, you need to run a few Docker commands. Run the following commands in order:Create the query model
The chunking is complex and does a lot of particular things. To stabilize your Fusion environment and to simplify indexing and querying, this tutorial creates a separate model for querying. The query model code goes into less detail.A real instance of this class with thesnowflake-arctic-embed-xs model is as follows:This code pulls from Hugging Face. To have the model load in the image without pulling from Hugging Face or other external sources, download the model weights into a folder name and change the model name to the folder name preceded by
./.Deploy the models in Fusion
Now you can go to Fusion to deploy your model. You must deploy the indexing model and the querying model.- In Fusion, navigate to Collections > Jobs.
- Add a job by clicking the Add+ Button and selecting Create Ray Model Deployment.
-
Fill in each of the text fields. Chunking will need a higher memory and CPU limit requirement than the default:
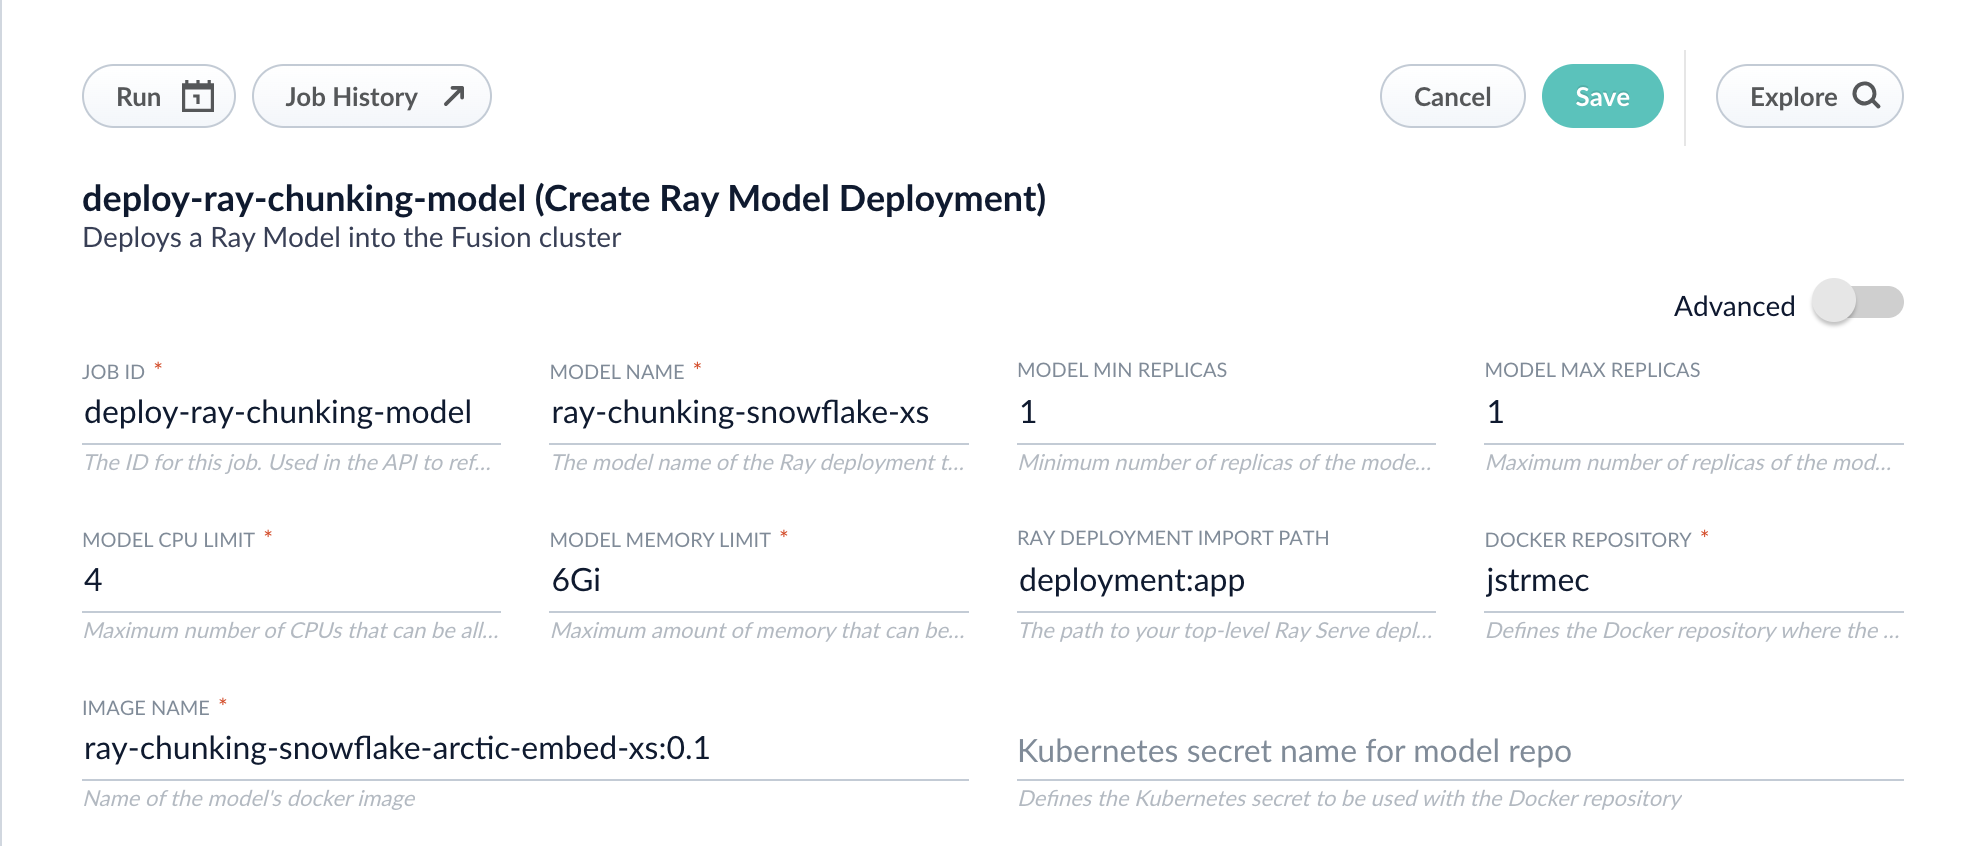
-
Click Advanced to view and configure advanced details:
- Click Save, then Run and Start.
- Repeat these steps for the querying model.
Configure the Fusion pipelines
Your real-world pipeline configuration depends on your use case and model, but for our example we will configure the index pipeline and then the query pipeline.Configure the index pipeline
The index pipeline requires at least two additional stages: the Machine Learning stage and the Local Chunker stage.Create the Machine Learning stage first. To create the Machine Learning stage:- Create a new index pipeline or load an existing one for editing.
- Click Add a Stage and then Machine Learning.
-
In the new Machine Learning stage, fill in these fields:
- The model ID
-
The model input
-
The model output
- Save the stage.
- In the same existing index pipeline, click Add a Stage and then Local Chunker.
- In the new stage, fill in these fields:
** The Input Context Variable is
<ctx.chunkedData>** The Destination Field Name and Context Output isray_chunk_vector_384v
Configure the query pipeline
The query pipeline requires at least two additional stages: the Chunking Neural Hybrid Query stage and either the Machine Learning stage with a context key vector or the Ray/Seldon Vectorize Query stage. If you followed the full tutorial, use the Machine Learning stage.To set up the Machine Learning query stage:- Create a new query pipeline or load an existing one for editing.
- Click Add a Stage and then Machine Learning.
- In the new stage, fill in these fields:
- The model ID
-
The model input as shown below:
-
The model output as shown below:
- In the same existing query pipeline, click Add a Stage and then Chunking Neural Hybrid Query.
- In the new stage, fill in the required fields.
solrconfig.xml file as described in the prerequisites of this tutorial.Accepted format
The Local Chunker stage accepts data formatted in a specific format:chunkedData’s key:
solrConfig.xml file:
Vector definitions
Add the following vector definitions to yourmanaged-schema.xml file: