

In Fusion 5.9.12 and later, Ray replaces Seldon for model hosting.
Models previously provided as Seldon deployments are not deployable to Ray without changes.
You can redeploy the same underlying model on Ray by building a ray[serve] compatible Docker image and using Create Ray Model Deployment, but do not reuse the Seldon deployment image or endpoint.
- sentiment-general model. This model is a general purpose sentiment prediction model that is trained on short sentences and text for intent prediction. For more information, see Sentiment analysis and prediction.
- sentiment-reviews model. This model is trained on customer reviews and longer text. The model also supports attention weights output that can be used for highlighting the tokens that provide stronger sentiment. For more information, see Sentiment analysis and prediction.
- pre-trained scispaCy model. This model is trained on biomedical text.
- qna-coldstart-large model. This model is trained on a variety of corpuses and tasks. For more information, see Smart answers.
- qna-coldstart-multilingual model. This model is trained on a variety of corpuses and tasks that supports 16 languages. For more information, see Smart answers.
Deploy the sentiment-general Model
Deploy the sentiment-general Model
This topic explains how to deploy the sentiment-general pre-trained sentiment prediction model. This is a general-purpose sentiment prediction model, trained on short sentences. It is suitable for short texts and for intent prediction.
Install the model in Lucidworks Search
- Navigate to Collections > Jobs.
- Select New > Create Seldon Core Model Deployment.
-
Configure the job as follows:
- Job ID. The ID for this job, such as
deploy-sentiment-general. - Model Name. The model name of the Seldon Core deployment that will be referenced in the Machine Learning pipeline stage configurations, such as
sentiment-general. - Docker Repository. The value is
lucidworks. - Image Name. The value is
sentiment-general:v1.0. - Kubernetes Secret Name for Model Repo. This value is left empty.
- Output Column Names for Model. The value is
[label, score].
- Job ID. The ID for this job, such as
- Click Save.
- Click Run > Start.
Configure the Machine Learning pipeline stages
In your index or query pipelines add Machine Learning stage and specify sentiment-general in the Model ID field (or a custom model name that was used during deployment).Configure the Machine Learning index stage
- In your index pipeline, click Add a Stage > Machine Learning.
-
In the Model ID field, enter the model name you configured above, such as
sentiment-general. -
In the Model input transformation script field, enter the following:
var modelInput = new java.util.HashMap() modelInput.put("text", doc.getFirstFieldValue("text")) modelInput -
In the Model output transformation script field, enter the following:
doc.addField("sentiment_label_s", modelOutput.get("label")[0]) doc.addField("sentiment_score_d", modelOutput.get("score")[0]) - Save the pipeline.
Configure the Machine Learning query stage
- In your query pipeline, click Add a Stage > Machine Learning.
- In the Model ID field, enter the model name you configured above, such as sentiment-general.
-
In the Model input transformation script field, enter the following:
var modelInput = new java.util.HashMap() modelInput.put("text", request.getFirstParam("q")) modelInput -
In the Model output transformation script field, enter the following:
{/* // To put into request */} request.putSingleParam("sentiment_label", modelOutput.get("label")[0]) request.putSingleParam("sentiment_score", modelOutput.get("score")[0]) {/* // To put into query context */} context.put("sentiment_label", modelOutput.get("label")[0]) context.put("sentiment_score", modelOutput.get("score")[0]) {/* // To put into response documents. NOTE: This can be done only after Solr Query stage */} var docs = response.get().getInnerResponse().getDocuments(); var ndocs = new java.util.ArrayList(); for (var i=0; i<docs.length;i++){ var doc = docs[i]; doc.putField("query_sentiment_label", modelOutput.get("label")[0]) doc.putField("query_sentiment_score", modelOutput.get("score")[0]) ndocs.add(doc); } response.get().getInnerResponse().updateDocuments(ndocs); - Save the pipeline.
Model output
Both of the pre-trained models output the following:- a label,
negativeorpositive - a score from
-2to2
{/* // Input */}
text = "That is awesome!"

{/* // Output */}
sentiment_label = 'positive'
sentiment_score = 1.998
sentiment_attention_tokens = ['That', "'", 's', 'awesome', '!']
sentiment_attention_weights = [0.154, 0.078, 0.069, 0.444, 0.255]
Deploy the sentiment-reviews Model
Deploy the sentiment-reviews Model
This topic explains how to deploy the sentiment-reviews pre-trained sentiment prediction model. This model is trained on a variety of customer reviews and optimized for longer texts. It also supports attention weights output that can be used for highlighting the tokens that provide stronger sentiment; see Model output below for an example.
Install the model in Lucidworks Search
- Navigate to Collections > Jobs.
- Select New > Create Seldon Core Model Deployment.
- Configure the job as follows:
- Job ID. The ID for this job, such as
deploy-sentiment-reviews - Model Name. The model name of the Seldon Core deployment that will be referenced in the Machine Learning pipeline stage configurations, such as
sentiment-reviews. - Docker Repository. The value is
lucidworks. - Image Name. The value is
sentiment-reviews:v1.0. - Kubernetes Secret Name for Model Repo. The value is left empty.
- Output Column Names for Model. The value is
[label, score, tokens, attention_weights].
- Job ID. The ID for this job, such as
- Click Save.
- Click Run > Start.
Configure the Machine Learning pipeline stages
You can put your sentiment prediction model to work using the Machine Learning index stage or Machine Learning query stage. You will specify the same Model Name that you used when you installed the model above.Generally, you only need to apply the model in the index pipeline to perform sentiment prediction on your content. Optionally, you can configure the query pipeline in a similar way, to perform sentiment prediction on incoming queries and outgoing responses and apply special treatment depending on the prediction.Configure the Machine Learning index stage
- In your index pipeline, click Add a Stage > Machine Learning.
- In the Model ID field, enter the model name you configured above, such as
sentiment-reviews. - In the Model input transformation script field, enter one of the following, depending on whether you want to output attention weights:
Without attention weights:With attention weights:var modelInput = new java.util.HashMap() modelInput.put("text", doc.getFirstFieldValue("text")) modelInputvar modelInput = new java.util.HashMap() modelInput.put("text", doc.getFirstFieldValue("text")) modelInput.put("attention_output", "true") modelInput - In the Model output transformation script field, enter the following:
Without attention weights:With attention weights:doc.addField("sentiment_label_s", modelOutput.get("label")[0]) doc.addField("sentiment_score_d", modelOutput.get("score")[0])doc.addField("sentiment_label_s", modelOutput.get("label")[0]) doc.addField("sentiment_score_d", modelOutput.get("score")[0]) doc.addField("sentiment_attention_tokens_ss", modelOutput.get("tokens")) doc.addField("sentiment_attention_weights_ds", modelOutput.get("attention_weights")) - Save the pipeline.
Optional: Configure the Machine Learning query stage
- In your query pipeline, click Add a Stage > Machine Learning.
- In the Model ID field, enter the model name you configured above, such as sentiment-reviews.
-
In the Model input transformation script field, enter the following:
Without attention weights:With attention weights:var modelInput = new java.util.HashMap() modelInput.put("text", request.getFirstParam("q")) modelInputvar modelInput = new java.util.HashMap() modelInput.put("text", request.getFirstParam("q")) modelInput.put("attention_output", "true") modelInput -
In the Model output transformation script field, enter the following, noting the sections that need to be uncommented if you are using attention weights:
{/* // To put into request */} request.putSingleParam("sentiment_label", modelOutput.get("label")[0]) request.putSingleParam("sentiment_score", modelOutput.get("score")[0]) {/* // With attention output also uncomment this */} {/* // request.putSingleParam("sentiment_attention_tokens", modelOutput.get("tokens")) */} {/* // request.putSingleParam("sentiment_attention_weights", modelOutput.get("attention_weights")) */} {/* // To put into query context */} context.put("sentiment_label", modelOutput.get("label")[0]) context.put("sentiment_score", modelOutput.get("score")[0]) {/* // With attention output also uncomment this */} {/* // context.put("sentiment_attention_tokens", modelOutput.get("tokens")) */} {/* // context.put("sentiment_attention_weights", modelOutput.get("attention_weights")) */} {/* // To put into response documents (can be done only after Solr Query stage) */} var docs = response.get().getInnerResponse().getDocuments(); var ndocs = new java.util.ArrayList(); var attention_tokens = modelOutput.get("tokens") var attention_weights = modelOutput.get("attention_weights") var attention_tokens_arr = new java.util.ArrayList(attention_tokens.size()); var attention_weights_arr = new java.util.ArrayList(attention_weights.size()); for ( i = 0; i < attention_tokens.size(); i++) { attention_tokens_arr.add(attention_tokens[i]) attention_weights_arr.add(attention_weights[i]) } for (var i=0; i<docs.length;i++){ var doc = docs[i]; doc.putField("query_sentiment_label", modelOutput.get("label")[0]) doc.putField("query_sentiment_score", modelOutput.get("score")[0]) {/* // With attention output also uncomment this */} {/* // doc.putField("query_sentiment_attention_tokens", attention_tokens_arr) */} {/* // doc.putField("query_sentiment_attention_weights", attention_weights_arr) */} ndocs.add(doc); } response.get().getInnerResponse().updateDocuments(ndocs); - Save the pipeline.
Model output
Both of the pre-trained models output the following:- a label,
negativeorpositive - a score from
-2to2
{/* // Input */}
text = "That is awesome!"

{/* // Output */}
sentiment_label = ‘positive’
sentiment_score = 1.998
sentiment_attention_tokens = ['That', "'", 's', 'awesome', '!']
sentiment_attention_weights = [0.154, 0.078, 0.069, 0.444, 0.255]
Deploy a pre-trained scispaCy model
Deploy a pre-trained scispaCy model
This article uses a pre-packaged model, which you do not need to download to deploy. To use the pre-packaged model, skip to Deploy model to Fusion. The section Create the model describes how to complete this process on your own.
Create the model (OPTIONAL)
Skip this section to use the pre-packaged model.
- Copy the
scispacy.ipynbfile below and open it in Jupyter Notebook (or a similar alternative):{ "cells": [ { "cell_type": "code", "execution_count": null, "metadata": { "ExecuteTime": { "end_time": "2020-05-06T05:07:38.221687Z", "start_time": "2020-05-06T05:06:32.961288Z" } }, "outputs": [], "source": [ "!pip install scispacy" ] }, { "cell_type": "code", "execution_count": null, "metadata": { "ExecuteTime": { "end_time": "2020-05-06T05:08:11.923655Z", "start_time": "2020-05-06T05:08:03.582073Z" } }, "outputs": [], "source": [ "!pip install https://s3-us-west-2.amazonaws.com/ai2-s2-scispacy/releases/v0.2.4/en_core_sci_sm-0.2.4.tar.gz" ] }, { "cell_type": "code", "execution_count": 131, "metadata": { "ExecuteTime": { "end_time": "2020-05-06T18:16:44.624754Z", "start_time": "2020-05-06T18:16:42.556474Z" } }, "outputs": [ { "name": "stdout", "output_type": "stream", "text": [ "[\n", "Background: Felid herpesvirus 1 (FHV-1) causes upper respiratory tract diseases in cats worldwide, including nasal and ocular discharge, conjunctivitis and oral ulceration., The nature and severity of disease can vary between clinical cases., Genetic determinants of virulence are likely to contribute to differences in the in vivo phenotype of FHV-1 isolates, but to date there have been limited studies investigating FHV-1 genetic diversity., This study used next generation sequencing to compare the genomes of contemporary Australian clinical isolates of FHV-1, vaccine isolates and historical clinical isolates, including isolates that predated the introduction of live attenuated vaccines into Australia., Analysis of the genome sequences aimed to assess the level of genetic diversity, identify potential genetic markers that could influence the in vivo phenotype of the isolates and examine the sequences for evidence of recombination., Results: The full genome sequences of 26 isolates of FHV-1 were determined, including two vaccine isolates and 24 clinical isolates that were collected over a period of approximately 40 years., Analysis of the genome sequences revealed a remarkably low level of diversity (0.0-0.01 %) between the isolates., No potential genetic determinants of virulence were identified, but unique single nucleotide polymorphisms (SNPs) in the UL28 and UL44 genes were detected in the vaccine isolates that were not present in the clinical isolates., No evidence of FHV-1 recombination was detected using multiple methods of recombination detection, even though many of the isolates originated from cats housed in a shelter environment where high infective pressures were likely to exist., Evidence of displacement of dominant FHV-1 isolates with other (genetically distinct) FHV-1 isolates over time was observed amongst the isolates obtained from the shelter-housed animals., The results show that FHV-1 genomes are highly conserved., The lack of recombination detected in the FHV-1 genomes suggests that the risk of attenuated vaccines recombining to generate virulent field viruses is lower than has been suggested for some other herpesviruses., The SNPs detected only in the vaccine isolates offer the potential to develop PCR-based methods of differentiating vaccine and clinical isolates of FHV-1 in order to facilitate future epidemiological studies.\n", "]\n" ] } ], "source": [ "import scispacy\n", "import spacy\n", "\n", "nlp = spacy.load(\"en_core_sci_sm\")\n", "text = \"\"\"\n", "Background: Felid herpesvirus 1 (FHV-1) causes upper respiratory tract diseases in cats worldwide, including nasal and ocular discharge, conjunctivitis and oral ulceration. The nature and severity of disease can vary between clinical cases. Genetic determinants of virulence are likely to contribute to differences in the in vivo phenotype of FHV-1 isolates, but to date there have been limited studies investigating FHV-1 genetic diversity. This study used next generation sequencing to compare the genomes of contemporary Australian clinical isolates of FHV-1, vaccine isolates and historical clinical isolates, including isolates that predated the introduction of live attenuated vaccines into Australia. Analysis of the genome sequences aimed to assess the level of genetic diversity, identify potential genetic markers that could influence the in vivo phenotype of the isolates and examine the sequences for evidence of recombination. Results: The full genome sequences of 26 isolates of FHV-1 were determined, including two vaccine isolates and 24 clinical isolates that were collected over a period of approximately 40 years. Analysis of the genome sequences revealed a remarkably low level of diversity (0.0-0.01 %) between the isolates. No potential genetic determinants of virulence were identified, but unique single nucleotide polymorphisms (SNPs) in the UL28 and UL44 genes were detected in the vaccine isolates that were not present in the clinical isolates. No evidence of FHV-1 recombination was detected using multiple methods of recombination detection, even though many of the isolates originated from cats housed in a shelter environment where high infective pressures were likely to exist. Evidence of displacement of dominant FHV-1 isolates with other (genetically distinct) FHV-1 isolates over time was observed amongst the isolates obtained from the shelter-housed animals. The results show that FHV-1 genomes are highly conserved. The lack of recombination detected in the FHV-1 genomes suggests that the risk of attenuated vaccines recombining to generate virulent field viruses is lower than has been suggested for some other herpesviruses. The SNPs detected only in the vaccine isolates offer the potential to develop PCR-based methods of differentiating vaccine and clinical isolates of FHV-1 in order to facilitate future epidemiological studies.\n", "\"\"\"\n", "doc = nlp(text)\n", "\n", "print(list(doc.sents))" ] }, { "cell_type": "code", "execution_count": 139, "metadata": { "ExecuteTime": { "end_time": "2020-05-06T18:18:07.268124Z", "start_time": "2020-05-06T18:18:07.263270Z" } }, "outputs": [ { "data": { "text/plain": [ "spacy.tokens.span.Span" ] }, "execution_count": 139, "metadata": {}, "output_type": "execute_result" } ], "source": [ "type(doc.ents[0])" ] }, { "cell_type": "code", "execution_count": 140, "metadata": { "ExecuteTime": { "end_time": "2020-05-06T18:18:23.948772Z", "start_time": "2020-05-06T18:18:23.941313Z" }, "scrolled": true }, "outputs": [ { "data": { "text/plain": [ "['Felid herpesvirus 1',\n", " 'FHV-1',\n", " 'upper respiratory tract diseases',\n", " 'cats',\n", " 'nasal',\n", " 'ocular discharge',\n", " 'conjunctivitis',\n", " 'oral ulceration',\n", " 'nature',\n", " 'severity',\n", " 'disease',\n", " 'clinical cases',\n", " 'Genetic determinants',\n", " 'virulence',\n", " 'in vivo',\n", " 'phenotype',\n", " 'FHV-1',\n", " 'isolates',\n", " 'investigating',\n", " 'FHV-1',\n", " 'genetic diversity',\n", " 'study',\n", " 'next generation sequencing',\n", " 'compare',\n", " 'genomes',\n", " 'contemporary',\n", " 'Australian',\n", " 'clinical isolates',\n", " 'FHV-1',\n", " 'vaccine',\n", " 'isolates',\n", " 'historical clinical isolates',\n", " 'isolates',\n", " 'introduction',\n", " 'live attenuated vaccines',\n", " 'Australia',\n", " 'Analysis',\n", " 'genome sequences',\n", " 'assess',\n", " 'level',\n", " 'genetic diversity',\n", " 'genetic markers',\n", " 'influence',\n", " 'in vivo',\n", " 'phenotype',\n", " 'isolates',\n", " 'sequences',\n", " 'evidence',\n", " 'recombination',\n", " 'genome sequences',\n", " 'isolates',\n", " 'FHV-1',\n", " 'vaccine',\n", " 'isolates',\n", " 'clinical isolates',\n", " 'period',\n", " 'years',\n", " 'Analysis',\n", " 'genome sequences',\n", " 'low',\n", " 'level',\n", " 'diversity',\n", " 'isolates',\n", " 'genetic determinants',\n", " 'virulence',\n", " 'identified',\n", " 'single nucleotide polymorphisms',\n", " 'SNPs',\n", " 'UL28',\n", " 'UL44 genes',\n", " 'detected',\n", " 'vaccine',\n", " 'isolates',\n", " 'clinical isolates',\n", " 'FHV-1',\n", " 'recombination',\n", " 'detected',\n", " 'multiple methods',\n", " 'recombination',\n", " 'detection',\n", " 'isolates',\n", " 'originated',\n", " 'cats',\n", " 'housed',\n", " 'shelter environment',\n", " 'infective pressures',\n", " 'Evidence',\n", " 'displacement',\n", " 'dominant',\n", " 'FHV-1',\n", " 'isolates',\n", " 'FHV-1',\n", " 'isolates',\n", " 'time',\n", " 'isolates',\n", " 'shelter-housed animals',\n", " 'results',\n", " 'FHV-1',\n", " 'genomes',\n", " 'recombination',\n", " 'detected',\n", " 'FHV-1',\n", " 'genomes',\n", " 'risk',\n", " 'attenuated vaccines',\n", " 'virulent field viruses',\n", " 'herpesviruses',\n", " 'SNPs',\n", " 'detected',\n", " 'vaccine',\n", " 'isolates',\n", " 'PCR-based methods',\n", " 'differentiating vaccine',\n", " 'clinical isolates',\n", " 'FHV-1',\n", " 'epidemiological studies']" ] }, "execution_count": 140, "metadata": {}, "output_type": "execute_result" } ], "source": [ "list(map(lambda x: x.text, doc.ents))" ] }, { "cell_type": "code", "execution_count": 7, "metadata": { "ExecuteTime": { "end_time": "2020-05-06T05:09:32.865950Z", "start_time": "2020-05-06T05:09:32.269961Z" } }, "outputs": [], "source": [ "import pandas as pd" ] }, { "cell_type": "code", "execution_count": 8, "metadata": { "ExecuteTime": { "end_time": "2020-05-06T05:10:23.140353Z", "start_time": "2020-05-06T05:10:23.116394Z" } }, "outputs": [], "source": [ "df = pd.read_csv(\"./sampleJSON_body_content.csv\", sep='|')" ] }, { "cell_type": "code", "execution_count": 9, "metadata": { "ExecuteTime": { "end_time": "2020-05-06T05:10:24.869383Z", "start_time": "2020-05-06T05:10:24.843942Z" } }, "outputs": [ { "data": { "text/html": [ "<div>\n", "<style scoped>\n", " .dataframe tbody tr th:only-of-type {\n", " vertical-align: middle;\n", " }\n", "\n", " .dataframe tbody tr th {\n", " vertical-align: top;\n", " }\n", "\n", " .dataframe thead th {\n", " text-align: right;\n", " }\n", "</style>\n", "<table border=\"1\" class=\"dataframe\">\n", " <thead>\n", " <tr style=\"text-align: right;\">\n", " <th></th>\n", " <th>body_t</th>\n", " <th>title_t</th>\n", " <th>bibliography_t</th>\n", " </tr>\n", " </thead>\n", " <tbody>\n", " <tr>\n", " <th>0</th>\n", " <td>Background: Felid herpesvirus 1 (FHV-1) causes...</td>\n", " <td>Low genetic diversity among historical and con...</td>\n", " <td>Common virus infections in cats, before and af...</td>\n", " </tr>\n", " <tr>\n", " <th>1</th>\n", " <td>This article uses data from Thomson Reuters We...</td>\n", " <td>Synthetic Biology: Mapping the Scientific Land...</td>\n", " <td>Synthetic genomics -Options for governance,\"Xe...</td>\n", " </tr>\n", " <tr>\n", " <th>2</th>\n", " <td>Background: Recurrent acute otitis media (rAOM...</td>\n", " <td>A microbiome case-control study of recurrent a...</td>\n", " <td>Natural history, definitions, risk factors and...</td>\n", " </tr>\n", " <tr>\n", " <th>3</th>\n", " <td>Background: Coronaviruses (CoVs) primarily cau...</td>\n", " <td>Coronavirus envelope protein: current knowledge</td>\n", " <td>Virus taxonomy: Classification and nomenclatur...</td>\n", " </tr>\n", " <tr>\n", " <th>4</th>\n", " <td>Corona viruses cause common cold, and infectio...</td>\n", " <td>The history and epidemiology of Middle East re...</td>\n", " <td>Novel coronavirus-Saudi Arabia: human isolate....</td>\n", " </tr>\n", " </tbody>\n", "</table>\n", "</div>" ], "text/plain": [ " body_t \\\n", "0 Background: Felid herpesvirus 1 (FHV-1) causes... \n", "1 This article uses data from Thomson Reuters We... \n", "2 Background: Recurrent acute otitis media (rAOM... \n", "3 Background: Coronaviruses (CoVs) primarily cau... \n", "4 Corona viruses cause common cold, and infectio... \n", "\n", " title_t \\\n", "0 Low genetic diversity among historical and con... \n", "1 Synthetic Biology: Mapping the Scientific Land... \n", "2 A microbiome case-control study of recurrent a... \n", "3 Coronavirus envelope protein: current knowledge \n", "4 The history and epidemiology of Middle East re... \n", "\n", " bibliography_t \n", "0 Common virus infections in cats, before and af... \n", "1 Synthetic genomics -Options for governance,\"Xe... \n", "2 Natural history, definitions, risk factors and... \n", "3 Virus taxonomy: Classification and nomenclatur... \n", "4 Novel coronavirus-Saudi Arabia: human isolate.... " ] }, "execution_count": 9, "metadata": {}, "output_type": "execute_result" } ], "source": [ "df" ] }, { "cell_type": "code", "execution_count": 64, "metadata": { "ExecuteTime": { "end_time": "2020-05-06T05:32:17.285847Z", "start_time": "2020-05-06T05:32:17.281275Z" } }, "outputs": [ { "data": { "text/plain": [ "'Background: Felid herpesvirus 1 (FHV-1) causes upper respiratory tract diseases in cats worldwide, including nasal and ocular discharge, conjunctivitis and oral ulceration. The nature and severity of disease can vary between clinical cases. Genetic determinants of virulence are likely to contribute to differences in the in vivo phenotype of FHV-1 isolates, but to date there have been limited studies investigating FHV-1 genetic diversity. This study used next generation sequencing to compare the genomes of contemporary Australian clinical isolates of FHV-1, vaccine isolates and historical clinical isolates, including isolates that predated the introduction of live attenuated vaccines into Australia. Analysis of the genome sequences aimed to assess the level of genetic diversity, identify potential genetic markers that could influence the in vivo phenotype of the isolates and examine the sequences for evidence of recombination. Results: The full genome sequences of 26 isolates of FHV-1 were determined, including two vaccine isolates and 24 clinical isolates that were collected over a period of approximately 40 years. Analysis of the genome sequences revealed a remarkably low level of diversity (0.0-0.01 %) between the isolates. No potential genetic determinants of virulence were identified, but unique single nucleotide polymorphisms (SNPs) in the UL28 and UL44 genes were detected in the vaccine isolates that were not present in the clinical isolates. No evidence of FHV-1 recombination was detected using multiple methods of recombination detection, even though many of the isolates originated from cats housed in a shelter environment where high infective pressures were likely to exist. Evidence of displacement of dominant FHV-1 isolates with other (genetically distinct) FHV-1 isolates over time was observed amongst the isolates obtained from the shelter-housed animals. The results show that FHV-1 genomes are highly conserved. The lack of recombination detected in the FHV-1 genomes suggests that the risk of attenuated vaccines recombining to generate virulent field viruses is lower than has been suggested for some other herpesviruses. The SNPs detected only in the vaccine isolates offer the potential to develop PCR-based methods of differentiating vaccine and clinical isolates of FHV-1 in order to facilitate future epidemiological studies.'" ] }, "execution_count": 64, "metadata": {}, "output_type": "execute_result" } ], "source": [ "df.body_t[0]" ] }, { "cell_type": "code", "execution_count": 52, "metadata": { "ExecuteTime": { "end_time": "2020-05-06T05:26:55.678392Z", "start_time": "2020-05-06T05:26:55.674761Z" } }, "outputs": [], "source": [ "def get_entities(text):\n", " doc = nlp(text)\n", " return [list(map(lambda x: x.text, doc.ents))]" ] }, { "cell_type": "code", "execution_count": 53, "metadata": { "ExecuteTime": { "end_time": "2020-05-06T05:26:56.461418Z", "start_time": "2020-05-06T05:26:56.257495Z" } }, "outputs": [ { "data": { "text/plain": [ "0 [[Background, Felid herpesvirus 1, FHV-1, uppe...\n", "1 [[article, data, Thomson Reuters, Web of Scien...\n", "2 [[Background, Recurrent acute otitis media, rA...\n", "3 [[Background, Coronaviruses, CoVs, enzootic in...\n", "4 [[Corona viruses, cold, infections, corona vir...\n", "dtype: object" ] }, "execution_count": 53, "metadata": {}, "output_type": "execute_result" } ], "source": [ "df.apply(lambda x: get_entities(x['body_t']), axis=1)" ] }, { "cell_type": "markdown", "metadata": {}, "source": [ "### Create seldon class" ] }, { "cell_type": "code", "execution_count": 112, "metadata": { "ExecuteTime": { "end_time": "2020-05-06T16:38:40.723642Z", "start_time": "2020-05-06T16:38:40.717585Z" } }, "outputs": [], "source": [ "import spacy\n", "import scispacy\n", "\n", "class scispacy():\n", " def __init__(self):\n", " self.nlp = spacy.load(\"en_core_sci_sm\")\n", " \n", " def predict(self, text, names=None):\n", " doc = nlp(str(text[0]))\n", " return [list(map(lambda x: x.text, doc.ents))]\n", "\n", " def class_names(self):\n", " return [\"entities\"]" ] }, { "cell_type": "code", "execution_count": 113, "metadata": { "ExecuteTime": { "end_time": "2020-05-06T16:38:42.441214Z", "start_time": "2020-05-06T16:38:41.044636Z" } }, "outputs": [], "source": [ "model = scispacy()" ] }, { "cell_type": "code", "execution_count": 115, "metadata": { "ExecuteTime": { "end_time": "2020-05-06T16:38:59.189301Z", "start_time": "2020-05-06T16:38:59.069945Z" } }, "outputs": [ { "data": { "text/plain": [ "[['Background',\n", " 'Felid herpesvirus 1',\n", " 'FHV-1',\n", " 'upper respiratory tract diseases',\n", " 'cats',\n", " 'nasal',\n", " 'ocular discharge',\n", " 'conjunctivitis',\n", " 'oral ulceration',\n", " 'nature',\n", " 'severity',\n", " 'disease',\n", " 'clinical cases',\n", " 'Genetic determinants',\n", " 'virulence',\n", " 'in vivo',\n", " 'phenotype',\n", " 'FHV-1',\n", " 'isolates',\n", " 'investigating',\n", " 'FHV-1',\n", " 'genetic diversity',\n", " 'study',\n", " 'next generation sequencing',\n", " 'compare',\n", " 'genomes',\n", " 'contemporary',\n", " 'Australian',\n", " 'clinical isolates',\n", " 'FHV-1',\n", " 'vaccine',\n", " 'isolates',\n", " 'historical clinical isolates',\n", " 'isolates',\n", " 'introduction',\n", " 'live attenuated vaccines',\n", " 'Australia',\n", " 'Analysis',\n", " 'genome sequences',\n", " 'assess',\n", " 'level',\n", " 'genetic diversity',\n", " 'genetic markers',\n", " 'influence',\n", " 'in vivo',\n", " 'phenotype',\n", " 'isolates',\n", " 'sequences',\n", " 'evidence',\n", " 'recombination',\n", " 'genome sequences',\n", " 'isolates',\n", " 'FHV-1',\n", " 'vaccine',\n", " 'isolates',\n", " 'clinical isolates',\n", " 'period',\n", " 'years',\n", " 'Analysis',\n", " 'genome sequences',\n", " 'low',\n", " 'level',\n", " 'diversity',\n", " 'isolates',\n", " 'genetic determinants',\n", " 'virulence',\n", " 'identified',\n", " 'single nucleotide polymorphisms',\n", " 'SNPs',\n", " 'UL28',\n", " 'UL44 genes',\n", " 'detected',\n", " 'vaccine',\n", " 'isolates',\n", " 'clinical isolates',\n", " 'FHV-1',\n", " 'recombination',\n", " 'detected',\n", " 'multiple methods',\n", " 'recombination',\n", " 'detection',\n", " 'isolates',\n", " 'originated',\n", " 'cats',\n", " 'housed',\n", " 'shelter environment',\n", " 'infective pressures',\n", " 'Evidence',\n", " 'displacement',\n", " 'dominant',\n", " 'FHV-1',\n", " 'isolates',\n", " 'FHV-1',\n", " 'isolates',\n", " 'time',\n", " 'isolates',\n", " 'shelter-housed animals',\n", " 'results',\n", " 'FHV-1',\n", " 'genomes',\n", " 'recombination',\n", " 'detected',\n", " 'FHV-1',\n", " 'genomes',\n", " 'risk',\n", " 'attenuated vaccines',\n", " 'virulent field viruses',\n", " 'herpesviruses',\n", " 'SNPs',\n", " 'detected',\n", " 'vaccine',\n", " 'isolates',\n", " 'PCR-based methods',\n", " 'differentiating vaccine',\n", " 'clinical isolates',\n", " 'FHV-1',\n", " 'epidemiological studies'],\n", " ['Background',\n", " 'Felid herpesvirus 1',\n", " 'FHV-1',\n", " 'upper respiratory tract diseases',\n", " 'cats',\n", " 'nasal',\n", " 'ocular discharge',\n", " 'conjunctivitis',\n", " 'oral ulceration',\n", " 'nature',\n", " 'severity',\n", " 'disease',\n", " 'clinical cases',\n", " 'Genetic determinants',\n", " 'virulence',\n", " 'in vivo',\n", " 'phenotype',\n", " 'FHV-1',\n", " 'isolates',\n", " 'investigating',\n", " 'FHV-1',\n", " 'genetic diversity',\n", " 'study',\n", " 'next generation sequencing',\n", " 'compare',\n", " 'genomes',\n", " 'contemporary',\n", " 'Australian',\n", " 'clinical isolates',\n", " 'FHV-1',\n", " 'vaccine',\n", " 'isolates',\n", " 'historical clinical isolates',\n", " 'isolates',\n", " 'introduction',\n", " 'live attenuated vaccines',\n", " 'Australia',\n", " 'Analysis',\n", " 'genome sequences',\n", " 'assess',\n", " 'level',\n", " 'genetic diversity',\n", " 'genetic markers',\n", " 'influence',\n", " 'in vivo',\n", " 'phenotype',\n", " 'isolates',\n", " 'sequences',\n", " 'evidence',\n", " 'recombination',\n", " 'genome sequences',\n", " 'isolates',\n", " 'FHV-1',\n", " 'vaccine',\n", " 'isolates',\n", " 'clinical isolates',\n", " 'period',\n", " 'years',\n", " 'Analysis',\n", " 'genome sequences',\n", " 'low',\n", " 'level',\n", " 'diversity',\n", " 'isolates',\n", " 'genetic determinants',\n", " 'virulence',\n", " 'identified',\n", " 'single nucleotide polymorphisms',\n", " 'SNPs',\n", " 'UL28',\n", " 'UL44 genes',\n", " 'detected',\n", " 'vaccine',\n", " 'isolates',\n", " 'clinical isolates',\n", " 'FHV-1',\n", " 'recombination',\n", " 'detected',\n", " 'multiple methods',\n", " 'recombination',\n", " 'detection',\n", " 'isolates',\n", " 'originated',\n", " 'cats',\n", " 'housed',\n", " 'shelter environment',\n", " 'infective pressures',\n", " 'Evidence',\n", " 'displacement',\n", " 'dominant',\n", " 'FHV-1',\n", " 'isolates',\n", " 'FHV-1',\n", " 'isolates',\n", " 'time',\n", " 'isolates',\n", " 'shelter-housed animals',\n", " 'results',\n", " 'FHV-1',\n", " 'genomes',\n", " 'recombination',\n", " 'detected',\n", " 'FHV-1',\n", " 'genomes',\n", " 'risk',\n", " 'attenuated vaccines',\n", " 'virulent field viruses',\n", " 'herpesviruses',\n", " 'SNPs',\n", " 'detected',\n", " 'vaccine',\n", " 'isolates',\n", " 'PCR-based methods',\n", " 'differentiating vaccine',\n", " 'clinical isolates',\n", " 'FHV-1',\n", " 'epidemiological studies']]" ] }, "execution_count": 115, "metadata": {}, "output_type": "execute_result" } ], "source": [ "model.predict(['Background: Felid herpesvirus 1 (FHV-1) causes upper respiratory tract diseases in cats worldwide, including nasal and ocular discharge, conjunctivitis and oral ulceration. The nature and severity of disease can vary between clinical cases. Genetic determinants of virulence are likely to contribute to differences in the in vivo phenotype of FHV-1 isolates, but to date there have been limited studies investigating FHV-1 genetic diversity. This study used next generation sequencing to compare the genomes of contemporary Australian clinical isolates of FHV-1, vaccine isolates and historical clinical isolates, including isolates that predated the introduction of live attenuated vaccines into Australia. Analysis of the genome sequences aimed to assess the level of genetic diversity, identify potential genetic markers that could influence the in vivo phenotype of the isolates and examine the sequences for evidence of recombination. Results: The full genome sequences of 26 isolates of FHV-1 were determined, including two vaccine isolates and 24 clinical isolates that were collected over a period of approximately 40 years. Analysis of the genome sequences revealed a remarkably low level of diversity (0.0-0.01 %) between the isolates. No potential genetic determinants of virulence were identified, but unique single nucleotide polymorphisms (SNPs) in the UL28 and UL44 genes were detected in the vaccine isolates that were not present in the clinical isolates. No evidence of FHV-1 recombination was detected using multiple methods of recombination detection, even though many of the isolates originated from cats housed in a shelter environment where high infective pressures were likely to exist. Evidence of displacement of dominant FHV-1 isolates with other (genetically distinct) FHV-1 isolates over time was observed amongst the isolates obtained from the shelter-housed animals. The results show that FHV-1 genomes are highly conserved. The lack of recombination detected in the FHV-1 genomes suggests that the risk of attenuated vaccines recombining to generate virulent field viruses is lower than has been suggested for some other herpesviruses. The SNPs detected only in the vaccine isolates offer the potential to develop PCR-based methods of differentiating vaccine and clinical isolates of FHV-1 in order to facilitate future epidemiological studies.', 'Background: Felid herpesvirus 1 (FHV-1) causes upper respiratory tract diseases in cats worldwide, including nasal and ocular discharge, conjunctivitis and oral ulceration. The nature and severity of disease can vary between clinical cases. Genetic determinants of virulence are likely to contribute to differences in the in vivo phenotype of FHV-1 isolates, but to date there have been limited studies investigating FHV-1 genetic diversity. This study used next generation sequencing to compare the genomes of contemporary Australian clinical isolates of FHV-1, vaccine isolates and historical clinical isolates, including isolates that predated the introduction of live attenuated vaccines into Australia. Analysis of the genome sequences aimed to assess the level of genetic diversity, identify potential genetic markers that could influence the in vivo phenotype of the isolates and examine the sequences for evidence of recombination. Results: The full genome sequences of 26 isolates of FHV-1 were determined, including two vaccine isolates and 24 clinical isolates that were collected over a period of approximately 40 years. Analysis of the genome sequences revealed a remarkably low level of diversity (0.0-0.01 %) between the isolates. No potential genetic determinants of virulence were identified, but unique single nucleotide polymorphisms (SNPs) in the UL28 and UL44 genes were detected in the vaccine isolates that were not present in the clinical isolates. No evidence of FHV-1 recombination was detected using multiple methods of recombination detection, even though many of the isolates originated from cats housed in a shelter environment where high infective pressures were likely to exist. Evidence of displacement of dominant FHV-1 isolates with other (genetically distinct) FHV-1 isolates over time was observed amongst the isolates obtained from the shelter-housed animals. The results show that FHV-1 genomes are highly conserved. The lack of recombination detected in the FHV-1 genomes suggests that the risk of attenuated vaccines recombining to generate virulent field viruses is lower than has been suggested for some other herpesviruses. The SNPs detected only in the vaccine isolates offer the potential to develop PCR-based methods of differentiating vaccine and clinical isolates of FHV-1 in order to facilitate future epidemiological studies.'])" ] }, { "cell_type": "markdown", "metadata": {}, "source": [ "### Package model" ] }, { "cell_type": "code", "execution_count": 70, "metadata": { "ExecuteTime": { "end_time": "2020-05-06T05:33:52.933701Z", "start_time": "2020-05-06T05:33:52.802139Z" } }, "outputs": [], "source": [ "!mkdir prediction-image" ] }, { "cell_type": "code", "execution_count": 125, "metadata": { "ExecuteTime": { "end_time": "2020-05-06T17:02:17.045213Z", "start_time": "2020-05-06T17:02:17.039201Z" } }, "outputs": [ { "name": "stdout", "output_type": "stream", "text": [ "Overwriting ./prediction-image/scispacymodel.py\n" ] } ], "source": [ "%%writefile ./prediction-image/scispacymodel.py\n", "import spacy\n", "import scispacy\n", "\n", "class scispacymodel():\n", " def __init__(self):\n", " self.nlp = spacy.load(\"en_core_sci_sm\")\n", " \n", " def predict(self, text, names=None):\n", " doc = self.nlp(str(text[0]))\n", " return [list(map(lambda x: x.text, doc.ents))]\n", "\n", " def class_names(self):\n", " return [\"entities\"]" ] }, { "cell_type": "code", "execution_count": 117, "metadata": { "ExecuteTime": { "end_time": "2020-05-06T16:39:40.263531Z", "start_time": "2020-05-06T16:39:40.258316Z" } }, "outputs": [ { "name": "stdout", "output_type": "stream", "text": [ "Overwriting ./prediction-image/requirements.txt\n" ] } ], "source": [ "%%writefile ./prediction-image/requirements.txt\n", "seldon-core\n", "spacy\n", "scispacy\n", "https://s3-us-west-2.amazonaws.com/ai2-s2-scispacy/releases/v0.2.4/en_core_sci_sm-0.2.4.tar.gz" ] }, { "cell_type": "code", "execution_count": 126, "metadata": { "ExecuteTime": { "end_time": "2020-05-06T17:02:44.028671Z", "start_time": "2020-05-06T17:02:44.023316Z" } }, "outputs": [ { "name": "stdout", "output_type": "stream", "text": [ "Overwriting ./prediction-image/Dockerfile\n" ] } ], "source": [ "%%writefile ./prediction-image/Dockerfile\n", "FROM python:3.7-slim\n", "COPY . /app\n", "WORKDIR /app\n", "RUN apt-get update && apt-get install -y --no-install-recommends gcc python-dev && rm -rf /var/lib/apt/lists/*\n", "RUN pip install -r requirements.txt\n", "EXPOSE 5000\n", "\n", "# Define environment variable\n", "ENV MODEL_NAME scispacymodel\n", "ENV API_TYPE GRPC\n", "ENV SERVICE_TYPE MODEL\n", "ENV PERSISTENCE 0\n", "\n", "CMD exec seldon-core-microservice $MODEL_NAME $API_TYPE --service-type $SERVICE_TYPE --persistence $PERSISTENCE" ] }, { "cell_type": "code", "execution_count": 127, "metadata": { "ExecuteTime": { "end_time": "2020-05-06T17:02:45.536647Z", "start_time": "2020-05-06T17:02:45.389830Z" } }, "outputs": [ { "name": "stdout", "output_type": "stream", "text": [ "total 24\r\n", "-rw-r--r-- 1 sanketshahane staff 437 May 6 12:02 Dockerfile\r\n", "-rw-r--r-- 1 sanketshahane staff 122 May 6 11:39 requirements.txt\r\n", "-rw-r--r-- 1 sanketshahane staff 319 May 6 12:02 scispacymodel.py\r\n" ] } ], "source": [ "!ls -l ./prediction-image/" ] }, { "cell_type": "code", "execution_count": 120, "metadata": { "ExecuteTime": { "end_time": "2020-05-06T16:41:48.014460Z", "start_time": "2020-05-06T16:39:52.723301Z" }, "scrolled": true }, "outputs": [ { "name": "stdout", "output_type": "stream", "text": [ "Sending build context to Docker daemon 4.096kB\n", "Step 1/11 : FROM python:3.7-slim\n", " ---> 41fc79494704\n", "Step 2/11 : COPY . /app\n", " ---> c9e6fc5513ee\n", "Step 3/11 : WORKDIR /app\n", " ---> Running in 2fc04fff77f0\n", "Removing intermediate container 2fc04fff77f0\n", " ---> 7641514409e1\n", "Step 4/11 : RUN apt-get update && apt-get install -y --no-install-recommends gcc python-dev && rm -rf /var/lib/apt/lists/*\n", " ---> Running in 8ae1ae2629e3\n", "Get:1 http://deb.debian.org/debian buster InRelease [122 kB]\n", "Get:2 http://deb.debian.org/debian buster-updates InRelease [49.3 kB]\n", "Get:3 http://deb.debian.org/debian buster/main amd64 Packages [7907 kB]\n", "Get:4 http://security.debian.org/debian-security buster/updates InRelease [65.4 kB]\n", "Get:5 http://security.debian.org/debian-security buster/updates/main amd64 Packages [195 kB]\n", "Get:6 http://deb.debian.org/debian buster-updates/main amd64 Packages [7380 B]\n", "Fetched 8345 kB in 6s (1476 kB/s)\n", "Reading package lists...\n", "Reading package lists...\n", "Building dependency tree...\n", "Reading state information...\n", "The following additional packages will be installed:\n", " binutils binutils-common binutils-x86-64-linux-gnu cpp cpp-8 gcc-8 libasan5\n", " libatomic1 libbinutils libc-dev-bin libc6-dev libcc1-0 libexpat1-dev\n", " libgcc-8-dev libgomp1 libisl19 libitm1 liblsan0 libmpc3 libmpfr6 libmpx2\n", " libpython-dev libpython-stdlib libpython2-dev libpython2-stdlib libpython2.7\n", " libpython2.7-dev libpython2.7-minimal libpython2.7-stdlib libquadmath0\n", " libtsan0 libubsan1 linux-libc-dev mime-support python python-minimal python2\n", " python2-dev python2-minimal python2.7 python2.7-dev python2.7-minimal\n", "Suggested packages:\n", " binutils-doc cpp-doc gcc-8-locales gcc-multilib make manpages-dev autoconf\n", " automake libtool flex bison gdb gcc-doc gcc-8-multilib gcc-8-doc libgcc1-dbg\n", " libgomp1-dbg libitm1-dbg libatomic1-dbg libasan5-dbg liblsan0-dbg\n", " libtsan0-dbg libubsan1-dbg libmpx2-dbg libquadmath0-dbg glibc-doc python-doc\n", " python-tk python2-doc python2.7-doc binfmt-support\n", "Recommended packages:\n", " manpages manpages-dev bzip2 file xz-utils\n", "The following NEW packages will be installed:\n", " binutils binutils-common binutils-x86-64-linux-gnu cpp cpp-8 gcc gcc-8\n", " libasan5 libatomic1 libbinutils libc-dev-bin libc6-dev libcc1-0\n", " libexpat1-dev libgcc-8-dev libgomp1 libisl19 libitm1 liblsan0 libmpc3\n", " libmpfr6 libmpx2 libpython-dev libpython-stdlib libpython2-dev\n", " libpython2-stdlib libpython2.7 libpython2.7-dev libpython2.7-minimal\n", " libpython2.7-stdlib libquadmath0 libtsan0 libubsan1 linux-libc-dev\n", " mime-support python python-dev python-minimal python2 python2-dev\n", " python2-minimal python2.7 python2.7-dev python2.7-minimal\n", "0 upgraded, 44 newly installed, 0 to remove and 11 not upgraded.\n", "Need to get 69.3 MB of archives.\n", "After this operation, 207 MB of additional disk space will be used.\n", "Get:1 http://security.debian.org/debian-security buster/updates/main amd64 linux-libc-dev amd64 4.19.98-1+deb10u1 [1314 kB]\n", "Get:2 http://deb.debian.org/debian buster/main amd64 libpython2.7-minimal amd64 2.7.16-2+deb10u1 [395 kB]\n", "Get:3 http://deb.debian.org/debian buster/main amd64 python2.7-minimal amd64 2.7.16-2+deb10u1 [1369 kB]\n", "Get:4 http://deb.debian.org/debian buster/main amd64 python2-minimal amd64 2.7.16-1 [41.4 kB]\n", "Get:5 http://deb.debian.org/debian buster/main amd64 python-minimal amd64 2.7.16-1 [21.0 kB]\n", "Get:6 http://deb.debian.org/debian buster/main amd64 mime-support all 3.62 [37.2 kB]\n", "Get:7 http://deb.debian.org/debian buster/main amd64 libpython2.7-stdlib amd64 2.7.16-2+deb10u1 [1912 kB]\n", "Get:8 http://deb.debian.org/debian buster/main amd64 python2.7 amd64 2.7.16-2+deb10u1 [305 kB]\n", "Get:9 http://deb.debian.org/debian buster/main amd64 libpython2-stdlib amd64 2.7.16-1 [20.8 kB]\n", "Get:10 http://deb.debian.org/debian buster/main amd64 libpython-stdlib amd64 2.7.16-1 [20.8 kB]\n", "Get:11 http://deb.debian.org/debian buster/main amd64 python2 amd64 2.7.16-1 [41.6 kB]\n", "Get:12 http://deb.debian.org/debian buster/main amd64 python amd64 2.7.16-1 [22.8 kB]\n", "Get:13 http://deb.debian.org/debian buster/main amd64 binutils-common amd64 2.31.1-16 [2073 kB]\n", "Get:14 http://deb.debian.org/debian buster/main amd64 libbinutils amd64 2.31.1-16 [478 kB]\n", "Get:15 http://deb.debian.org/debian buster/main amd64 binutils-x86-64-linux-gnu amd64 2.31.1-16 [1823 kB]\n", "Get:16 http://deb.debian.org/debian buster/main amd64 binutils amd64 2.31.1-16 [56.8 kB]\n", "Get:17 http://deb.debian.org/debian buster/main amd64 libisl19 amd64 0.20-2 [587 kB]\n", "Get:18 http://deb.debian.org/debian buster/main amd64 libmpfr6 amd64 4.0.2-1 [775 kB]\n", "Get:19 http://deb.debian.org/debian buster/main amd64 libmpc3 amd64 1.1.0-1 [41.3 kB]\n", "Get:20 http://deb.debian.org/debian buster/main amd64 cpp-8 amd64 8.3.0-6 [8914 kB]\n", "Get:21 http://deb.debian.org/debian buster/main amd64 cpp amd64 4:8.3.0-1 [19.4 kB]\n", "Get:22 http://deb.debian.org/debian buster/main amd64 libcc1-0 amd64 8.3.0-6 [46.6 kB]\n", "Get:23 http://deb.debian.org/debian buster/main amd64 libgomp1 amd64 8.3.0-6 [75.8 kB]\n", "Get:24 http://deb.debian.org/debian buster/main amd64 libitm1 amd64 8.3.0-6 [27.7 kB]\n", "Get:25 http://deb.debian.org/debian buster/main amd64 libatomic1 amd64 8.3.0-6 [9032 B]\n", "Get:26 http://deb.debian.org/debian buster/main amd64 libasan5 amd64 8.3.0-6 [362 kB]\n", "Get:27 http://deb.debian.org/debian buster/main amd64 liblsan0 amd64 8.3.0-6 [131 kB]\n", "Get:28 http://deb.debian.org/debian buster/main amd64 libtsan0 amd64 8.3.0-6 [283 kB]\n", "Get:29 http://deb.debian.org/debian buster/main amd64 libubsan1 amd64 8.3.0-6 [120 kB]\n", "Get:30 http://deb.debian.org/debian buster/main amd64 libmpx2 amd64 8.3.0-6 [11.4 kB]\n", "Get:31 http://deb.debian.org/debian buster/main amd64 libquadmath0 amd64 8.3.0-6 [133 kB]\n", "Get:32 http://deb.debian.org/debian buster/main amd64 libgcc-8-dev amd64 8.3.0-6 [2298 kB]\n", "Get:33 http://deb.debian.org/debian buster/main amd64 gcc-8 amd64 8.3.0-6 [9452 kB]\n", "Get:34 http://deb.debian.org/debian buster/main amd64 gcc amd64 4:8.3.0-1 [5196 B]\n", "Get:35 http://deb.debian.org/debian buster/main amd64 libc-dev-bin amd64 2.28-10 [275 kB]\n", "Get:36 http://deb.debian.org/debian buster/main amd64 libc6-dev amd64 2.28-10 [2691 kB]\n", "Get:37 http://deb.debian.org/debian buster/main amd64 libexpat1-dev amd64 2.2.6-2+deb10u1 [153 kB]\n", "Get:38 http://deb.debian.org/debian buster/main amd64 libpython2.7 amd64 2.7.16-2+deb10u1 [1036 kB]\n", "Get:39 http://deb.debian.org/debian buster/main amd64 libpython2.7-dev amd64 2.7.16-2+deb10u1 [31.6 MB]\n", "Get:40 http://deb.debian.org/debian buster/main amd64 libpython2-dev amd64 2.7.16-1 [20.9 kB]\n", "Get:41 http://deb.debian.org/debian buster/main amd64 libpython-dev amd64 2.7.16-1 [20.9 kB]\n", "Get:42 http://deb.debian.org/debian buster/main amd64 python2.7-dev amd64 2.7.16-2+deb10u1 [294 kB]\n", "Get:43 http://deb.debian.org/debian buster/main amd64 python2-dev amd64 2.7.16-1 [1212 B]\n", "Get:44 http://deb.debian.org/debian buster/main amd64 python-dev amd64 2.7.16-1 [1192 B]\n", "\u001b[91mdebconf: delaying package configuration, since apt-utils is not installed\n", "\u001b[0mFetched 69.3 MB in 5s (13.9 MB/s)\n", "Selecting previously unselected package libpython2.7-minimal:amd64.\n", "(Reading database ... 6828 files and directories currently installed.)\n", "Preparing to unpack .../0-libpython2.7-minimal_2.7.16-2+deb10u1_amd64.deb ...\n", "Unpacking libpython2.7-minimal:amd64 (2.7.16-2+deb10u1) ...\n", "Selecting previously unselected package python2.7-minimal.\n", "Preparing to unpack .../1-python2.7-minimal_2.7.16-2+deb10u1_amd64.deb ...\n", "Unpacking python2.7-minimal (2.7.16-2+deb10u1) ...\n", "Selecting previously unselected package python2-minimal.\n", "Preparing to unpack .../2-python2-minimal_2.7.16-1_amd64.deb ...\n", "Unpacking python2-minimal (2.7.16-1) ...\n", "Selecting previously unselected package python-minimal.\n", "Preparing to unpack .../3-python-minimal_2.7.16-1_amd64.deb ...\n", "Unpacking python-minimal (2.7.16-1) ...\n", "Selecting previously unselected package mime-support.\n", "Preparing to unpack .../4-mime-support_3.62_all.deb ...\n", "Unpacking mime-support (3.62) ...\n", "Selecting previously unselected package libpython2.7-stdlib:amd64.\n", "Preparing to unpack .../5-libpython2.7-stdlib_2.7.16-2+deb10u1_amd64.deb ...\n", "Unpacking libpython2.7-stdlib:amd64 (2.7.16-2+deb10u1) ...\n", "Selecting previously unselected package python2.7.\n", "Preparing to unpack .../6-python2.7_2.7.16-2+deb10u1_amd64.deb ...\n", "Unpacking python2.7 (2.7.16-2+deb10u1) ...\n" ] }, { "name": "stdout", "output_type": "stream", "text": [ "Selecting previously unselected package libpython2-stdlib:amd64.\n", "Preparing to unpack .../7-libpython2-stdlib_2.7.16-1_amd64.deb ...\n", "Unpacking libpython2-stdlib:amd64 (2.7.16-1) ...\n", "Selecting previously unselected package libpython-stdlib:amd64.\n", "Preparing to unpack .../8-libpython-stdlib_2.7.16-1_amd64.deb ...\n", "Unpacking libpython-stdlib:amd64 (2.7.16-1) ...\n", "Setting up libpython2.7-minimal:amd64 (2.7.16-2+deb10u1) ...\n", "Setting up python2.7-minimal (2.7.16-2+deb10u1) ...\n", "Linking and byte-compiling packages for runtime python2.7...\n", "Setting up python2-minimal (2.7.16-1) ...\n", "Selecting previously unselected package python2.\n", "(Reading database ... 7613 files and directories currently installed.)\n", "Preparing to unpack .../python2_2.7.16-1_amd64.deb ...\n", "Unpacking python2 (2.7.16-1) ...\n", "Setting up python-minimal (2.7.16-1) ...\n", "Selecting previously unselected package python.\n", "(Reading database ... 7646 files and directories currently installed.)\n", "Preparing to unpack .../00-python_2.7.16-1_amd64.deb ...\n", "Unpacking python (2.7.16-1) ...\n", "Selecting previously unselected package binutils-common:amd64.\n", "Preparing to unpack .../01-binutils-common_2.31.1-16_amd64.deb ...\n", "Unpacking binutils-common:amd64 (2.31.1-16) ...\n", "Selecting previously unselected package libbinutils:amd64.\n", "Preparing to unpack .../02-libbinutils_2.31.1-16_amd64.deb ...\n", "Unpacking libbinutils:amd64 (2.31.1-16) ...\n", "Selecting previously unselected package binutils-x86-64-linux-gnu.\n", "Preparing to unpack .../03-binutils-x86-64-linux-gnu_2.31.1-16_amd64.deb ...\n", "Unpacking binutils-x86-64-linux-gnu (2.31.1-16) ...\n", "Selecting previously unselected package binutils.\n", "Preparing to unpack .../04-binutils_2.31.1-16_amd64.deb ...\n", "Unpacking binutils (2.31.1-16) ...\n", "Selecting previously unselected package libisl19:amd64.\n", "Preparing to unpack .../05-libisl19_0.20-2_amd64.deb ...\n", "Unpacking libisl19:amd64 (0.20-2) ...\n", "Selecting previously unselected package libmpfr6:amd64.\n", "Preparing to unpack .../06-libmpfr6_4.0.2-1_amd64.deb ...\n", "Unpacking libmpfr6:amd64 (4.0.2-1) ...\n", "Selecting previously unselected package libmpc3:amd64.\n", "Preparing to unpack .../07-libmpc3_1.1.0-1_amd64.deb ...\n", "Unpacking libmpc3:amd64 (1.1.0-1) ...\n", "Selecting previously unselected package cpp-8.\n", "Preparing to unpack .../08-cpp-8_8.3.0-6_amd64.deb ...\n", "Unpacking cpp-8 (8.3.0-6) ...\n", "Selecting previously unselected package cpp.\n", "Preparing to unpack .../09-cpp_4%3a8.3.0-1_amd64.deb ...\n", "Unpacking cpp (4:8.3.0-1) ...\n", "Selecting previously unselected package libcc1-0:amd64.\n", "Preparing to unpack .../10-libcc1-0_8.3.0-6_amd64.deb ...\n", "Unpacking libcc1-0:amd64 (8.3.0-6) ...\n", "Selecting previously unselected package libgomp1:amd64.\n", "Preparing to unpack .../11-libgomp1_8.3.0-6_amd64.deb ...\n", "Unpacking libgomp1:amd64 (8.3.0-6) ...\n", "Selecting previously unselected package libitm1:amd64.\n", "Preparing to unpack .../12-libitm1_8.3.0-6_amd64.deb ...\n", "Unpacking libitm1:amd64 (8.3.0-6) ...\n", "Selecting previously unselected package libatomic1:amd64.\n", "Preparing to unpack .../13-libatomic1_8.3.0-6_amd64.deb ...\n", "Unpacking libatomic1:amd64 (8.3.0-6) ...\n", "Selecting previously unselected package libasan5:amd64.\n", "Preparing to unpack .../14-libasan5_8.3.0-6_amd64.deb ...\n", "Unpacking libasan5:amd64 (8.3.0-6) ...\n", "Selecting previously unselected package liblsan0:amd64.\n", "Preparing to unpack .../15-liblsan0_8.3.0-6_amd64.deb ...\n", "Unpacking liblsan0:amd64 (8.3.0-6) ...\n", "Selecting previously unselected package libtsan0:amd64.\n", "Preparing to unpack .../16-libtsan0_8.3.0-6_amd64.deb ...\n", "Unpacking libtsan0:amd64 (8.3.0-6) ...\n", "Selecting previously unselected package libubsan1:amd64.\n", "Preparing to unpack .../17-libubsan1_8.3.0-6_amd64.deb ...\n", "Unpacking libubsan1:amd64 (8.3.0-6) ...\n", "Selecting previously unselected package libmpx2:amd64.\n", "Preparing to unpack .../18-libmpx2_8.3.0-6_amd64.deb ...\n", "Unpacking libmpx2:amd64 (8.3.0-6) ...\n", "Selecting previously unselected package libquadmath0:amd64.\n", "Preparing to unpack .../19-libquadmath0_8.3.0-6_amd64.deb ...\n", "Unpacking libquadmath0:amd64 (8.3.0-6) ...\n", "Selecting previously unselected package libgcc-8-dev:amd64.\n", "Preparing to unpack .../20-libgcc-8-dev_8.3.0-6_amd64.deb ...\n", "Unpacking libgcc-8-dev:amd64 (8.3.0-6) ...\n", "Selecting previously unselected package gcc-8.\n", "Preparing to unpack .../21-gcc-8_8.3.0-6_amd64.deb ...\n", "Unpacking gcc-8 (8.3.0-6) ...\n", "Selecting previously unselected package gcc.\n", "Preparing to unpack .../22-gcc_4%3a8.3.0-1_amd64.deb ...\n", "Unpacking gcc (4:8.3.0-1) ...\n", "Selecting previously unselected package libc-dev-bin.\n", "Preparing to unpack .../23-libc-dev-bin_2.28-10_amd64.deb ...\n", "Unpacking libc-dev-bin (2.28-10) ...\n", "Selecting previously unselected package linux-libc-dev:amd64.\n", "Preparing to unpack .../24-linux-libc-dev_4.19.98-1+deb10u1_amd64.deb ...\n", "Unpacking linux-libc-dev:amd64 (4.19.98-1+deb10u1) ...\n", "Selecting previously unselected package libc6-dev:amd64.\n", "Preparing to unpack .../25-libc6-dev_2.28-10_amd64.deb ...\n", "Unpacking libc6-dev:amd64 (2.28-10) ...\n", "Selecting previously unselected package libexpat1-dev:amd64.\n", "Preparing to unpack .../26-libexpat1-dev_2.2.6-2+deb10u1_amd64.deb ...\n", "Unpacking libexpat1-dev:amd64 (2.2.6-2+deb10u1) ...\n", "Selecting previously unselected package libpython2.7:amd64.\n", "Preparing to unpack .../27-libpython2.7_2.7.16-2+deb10u1_amd64.deb ...\n", "Unpacking libpython2.7:amd64 (2.7.16-2+deb10u1) ...\n", "Selecting previously unselected package libpython2.7-dev:amd64.\n", "Preparing to unpack .../28-libpython2.7-dev_2.7.16-2+deb10u1_amd64.deb ...\n", "Unpacking libpython2.7-dev:amd64 (2.7.16-2+deb10u1) ...\n", "Selecting previously unselected package libpython2-dev:amd64.\n", "Preparing to unpack .../29-libpython2-dev_2.7.16-1_amd64.deb ...\n", "Unpacking libpython2-dev:amd64 (2.7.16-1) ...\n", "Selecting previously unselected package libpython-dev:amd64.\n", "Preparing to unpack .../30-libpython-dev_2.7.16-1_amd64.deb ...\n", "Unpacking libpython-dev:amd64 (2.7.16-1) ...\n", "Selecting previously unselected package python2.7-dev.\n", "Preparing to unpack .../31-python2.7-dev_2.7.16-2+deb10u1_amd64.deb ...\n", "Unpacking python2.7-dev (2.7.16-2+deb10u1) ...\n", "Selecting previously unselected package python2-dev.\n", "Preparing to unpack .../32-python2-dev_2.7.16-1_amd64.deb ...\n", "Unpacking python2-dev (2.7.16-1) ...\n", "Selecting previously unselected package python-dev.\n", "Preparing to unpack .../33-python-dev_2.7.16-1_amd64.deb ...\n", "Unpacking python-dev (2.7.16-1) ...\n", "Setting up mime-support (3.62) ...\n", "Setting up binutils-common:amd64 (2.31.1-16) ...\n", "Setting up linux-libc-dev:amd64 (4.19.98-1+deb10u1) ...\n", "Setting up libgomp1:amd64 (8.3.0-6) ...\n", "Setting up libpython2.7-stdlib:amd64 (2.7.16-2+deb10u1) ...\n", "Setting up libasan5:amd64 (8.3.0-6) ...\n", "Setting up libmpfr6:amd64 (4.0.2-1) ...\n", "Setting up libquadmath0:amd64 (8.3.0-6) ...\n", "Setting up libmpc3:amd64 (1.1.0-1) ...\n", "Setting up libatomic1:amd64 (8.3.0-6) ...\n", "Setting up libmpx2:amd64 (8.3.0-6) ...\n", "Setting up libubsan1:amd64 (8.3.0-6) ...\n", "Setting up libisl19:amd64 (0.20-2) ...\n", "Setting up libbinutils:amd64 (2.31.1-16) ...\n", "Setting up cpp-8 (8.3.0-6) ...\n", "Setting up libc-dev-bin (2.28-10) ...\n", "Setting up libcc1-0:amd64 (8.3.0-6) ...\n", "Setting up liblsan0:amd64 (8.3.0-6) ...\n", "Setting up libitm1:amd64 (8.3.0-6) ...\n", "Setting up binutils-x86-64-linux-gnu (2.31.1-16) ...\n", "Setting up libtsan0:amd64 (8.3.0-6) ...\n", "Setting up libpython2.7:amd64 (2.7.16-2+deb10u1) ...\n", "Setting up python2.7 (2.7.16-2+deb10u1) ...\n", "Setting up libpython2-stdlib:amd64 (2.7.16-1) ...\n", "Setting up binutils (2.31.1-16) ...\n", "Setting up python2 (2.7.16-1) ...\n", "Setting up libpython-stdlib:amd64 (2.7.16-1) ...\n", "Setting up libgcc-8-dev:amd64 (8.3.0-6) ...\n", "Setting up cpp (4:8.3.0-1) ...\n", "Setting up libc6-dev:amd64 (2.28-10) ...\n", "Setting up python (2.7.16-1) ...\n", "Setting up gcc-8 (8.3.0-6) ...\n", "Setting up gcc (4:8.3.0-1) ...\n", "Setting up libexpat1-dev:amd64 (2.2.6-2+deb10u1) ...\n", "Setting up libpython2.7-dev:amd64 (2.7.16-2+deb10u1) ...\n", "Setting up libpython2-dev:amd64 (2.7.16-1) ...\n", "Setting up python2.7-dev (2.7.16-2+deb10u1) ...\n", "Setting up python2-dev (2.7.16-1) ...\n", "Setting up libpython-dev:amd64 (2.7.16-1) ...\n", "Setting up python-dev (2.7.16-1) ...\n", "Processing triggers for libc-bin (2.28-10) ...\n", "Removing intermediate container 8ae1ae2629e3\n", " ---> d1db0d2e7ffc\n", "Step 5/11 : RUN pip install -r requirements.txt\n", " ---> Running in 81d6c92a2adc\n", "Collecting https://s3-us-west-2.amazonaws.com/ai2-s2-scispacy/releases/v0.2.4/en_core_sci_sm-0.2.4.tar.gz (from -r requirements.txt (line 4))\n" ] }, { "name": "stdout", "output_type": "stream", "text": [ " Downloading https://s3-us-west-2.amazonaws.com/ai2-s2-scispacy/releases/v0.2.4/en_core_sci_sm-0.2.4.tar.gz (17.0 MB)\n", "Collecting seldon-core\n", " Downloading seldon_core-1.1.0-py3-none-any.whl (94 kB)\n", "Collecting spacy\n", " Downloading spacy-2.2.4-cp37-cp37m-manylinux1_x86_64.whl (10.6 MB)\n", "Collecting scispacy\n", " Downloading scispacy-0.2.4.tar.gz (38 kB)\n", "Collecting Flask-OpenTracing<1.2.0,>=1.1.0\n", " Downloading Flask-OpenTracing-1.1.0.tar.gz (8.2 kB)\n", "Collecting jaeger-client<4.2.0,>=4.1.0\n", " Downloading jaeger-client-4.1.0.tar.gz (80 kB)\n", "Collecting Flask<2.0.0\n", " Downloading Flask-1.1.2-py2.py3-none-any.whl (94 kB)\n", "Requirement already satisfied: setuptools>=41.0.0 in /usr/local/lib/python3.7/site-packages (from seldon-core->-r requirements.txt (line 1)) (45.1.0)\n", "Collecting grpcio<2.0.0\n", " Downloading grpcio-1.28.1-cp37-cp37m-manylinux2010_x86_64.whl (2.8 MB)\n", "Collecting azure-storage-blob<3.0.0,>=2.0.1\n", " Downloading azure_storage_blob-2.1.0-py2.py3-none-any.whl (88 kB)\n", "Collecting protobuf<4.0.0\n", " Downloading protobuf-3.11.3-cp37-cp37m-manylinux1_x86_64.whl (1.3 MB)\n", "Collecting grpcio-opentracing<1.2.0,>=1.1.4\n", " Downloading grpcio_opentracing-1.1.4-py3-none-any.whl (14 kB)\n", "Collecting pyaml<20.0.0\n", " Downloading pyaml-19.12.0-py2.py3-none-any.whl (17 kB)\n", "Collecting Flask-cors<4.0.0\n", " Downloading Flask_Cors-3.0.8-py2.py3-none-any.whl (14 kB)\n", "Collecting redis<4.0.0\n", " Downloading redis-3.5.0-py2.py3-none-any.whl (71 kB)\n", "Collecting numpy<2.0.0\n", " Downloading numpy-1.18.4-cp37-cp37m-manylinux1_x86_64.whl (20.2 MB)\n", "Collecting requests<3.0.0\n", " Downloading requests-2.23.0-py2.py3-none-any.whl (58 kB)\n", "Collecting gunicorn<20.1.0,>=19.9.0\n", " Downloading gunicorn-20.0.4-py2.py3-none-any.whl (77 kB)\n", "Collecting minio<6.0.0,>=4.0.9\n", " Downloading minio-5.0.10-py2.py3-none-any.whl (75 kB)\n", "Collecting prometheus-client<0.8.0,>=0.7.1\n", " Downloading prometheus_client-0.7.1.tar.gz (38 kB)\n", "Collecting opentracing<2.3.0,>=2.2.0\n", " Downloading opentracing-2.2.0.tar.gz (47 kB)\n", "Collecting flatbuffers<2.0.0\n", " Downloading flatbuffers-1.12-py2.py3-none-any.whl (15 kB)\n", "Collecting catalogue<1.1.0,>=0.0.7\n", " Downloading catalogue-1.0.0-py2.py3-none-any.whl (7.7 kB)\n", "Collecting tqdm<5.0.0,>=4.38.0\n", " Downloading tqdm-4.46.0-py2.py3-none-any.whl (63 kB)\n", "Collecting cymem<2.1.0,>=2.0.2\n", " Downloading cymem-2.0.3-cp37-cp37m-manylinux1_x86_64.whl (32 kB)\n", "Collecting blis<0.5.0,>=0.4.0\n", " Downloading blis-0.4.1-cp37-cp37m-manylinux1_x86_64.whl (3.7 MB)\n", "Collecting wasabi<1.1.0,>=0.4.0\n", " Downloading wasabi-0.6.0-py3-none-any.whl (20 kB)\n", "Collecting preshed<3.1.0,>=3.0.2\n", " Downloading preshed-3.0.2-cp37-cp37m-manylinux1_x86_64.whl (118 kB)\n", "Collecting murmurhash<1.1.0,>=0.28.0\n", " Downloading murmurhash-1.0.2-cp37-cp37m-manylinux1_x86_64.whl (19 kB)\n", "Collecting plac<1.2.0,>=0.9.6\n", " Downloading plac-1.1.3-py2.py3-none-any.whl (20 kB)\n", "Collecting srsly<1.1.0,>=1.0.2\n", " Downloading srsly-1.0.2-cp37-cp37m-manylinux1_x86_64.whl (185 kB)\n", "Collecting thinc==7.4.0\n", " Downloading thinc-7.4.0-cp37-cp37m-manylinux1_x86_64.whl (2.2 MB)\n", "Collecting awscli\n", " Downloading awscli-1.18.53.tar.gz (1.2 MB)\n", "Collecting conllu\n", " Downloading conllu-2.3.2-py2.py3-none-any.whl (13 kB)\n", "Collecting joblib\n", " Downloading joblib-0.14.1-py2.py3-none-any.whl (294 kB)\n", "Collecting nmslib>=1.7.3.6\n", " Downloading nmslib-2.0.6-cp37-cp37m-manylinux2010_x86_64.whl (13.0 MB)\n", "Collecting scikit-learn>=0.20.3\n", " Downloading scikit_learn-0.22.2.post1-cp37-cp37m-manylinux1_x86_64.whl (7.1 MB)\n", "Collecting pysbd\n", " Downloading pysbd-0.2.3-py3-none-any.whl (24 kB)\n", "Collecting threadloop<2,>=1\n", " Downloading threadloop-1.0.2.tar.gz (4.9 kB)\n", "Collecting thrift\n", " Downloading thrift-0.13.0.tar.gz (59 kB)\n", "Collecting tornado<6,>=4.3\n", " Downloading tornado-5.1.1.tar.gz (516 kB)\n", "Collecting Jinja2>=2.10.1\n", " Downloading Jinja2-2.11.2-py2.py3-none-any.whl (125 kB)\n", "Collecting click>=5.1\n", " Downloading click-7.1.2-py2.py3-none-any.whl (82 kB)\n", "Collecting itsdangerous>=0.24\n", " Downloading itsdangerous-1.1.0-py2.py3-none-any.whl (16 kB)\n", "Collecting Werkzeug>=0.15\n", " Downloading Werkzeug-1.0.1-py2.py3-none-any.whl (298 kB)\n", "Collecting six>=1.5.2\n", " Downloading six-1.14.0-py2.py3-none-any.whl (10 kB)\n", "Collecting azure-storage-common~=2.1\n", " Downloading azure_storage_common-2.1.0-py2.py3-none-any.whl (47 kB)\n", "Collecting azure-common>=1.1.5\n", " Downloading azure_common-1.1.25-py2.py3-none-any.whl (12 kB)\n", "Collecting PyYAML\n", " Downloading PyYAML-5.3.1.tar.gz (269 kB)\n", "Collecting chardet<4,>=3.0.2\n", " Downloading chardet-3.0.4-py2.py3-none-any.whl (133 kB)\n", "Collecting urllib3!=1.25.0,!=1.25.1,<1.26,>=1.21.1\n", " Downloading urllib3-1.25.9-py2.py3-none-any.whl (126 kB)\n", "Collecting idna<3,>=2.5\n", " Downloading idna-2.9-py2.py3-none-any.whl (58 kB)\n", "Collecting certifi>=2017.4.17\n", " Downloading certifi-2020.4.5.1-py2.py3-none-any.whl (157 kB)\n", "Collecting pytz\n", " Downloading pytz-2020.1-py2.py3-none-any.whl (510 kB)\n", "Collecting python-dateutil\n", " Downloading python_dateutil-2.8.1-py2.py3-none-any.whl (227 kB)\n", "Collecting configparser\n", " Downloading configparser-5.0.0-py3-none-any.whl (22 kB)\n", "Collecting importlib-metadata>=0.20; python_version < \"3.8\"\n", " Downloading importlib_metadata-1.6.0-py2.py3-none-any.whl (30 kB)\n", "Collecting botocore==1.16.3\n", " Downloading botocore-1.16.3-py2.py3-none-any.whl (6.2 MB)\n", "Collecting docutils<0.16,>=0.10\n", " Downloading docutils-0.15.2-py3-none-any.whl (547 kB)\n", "Collecting rsa<=3.5.0,>=3.1.2\n", " Downloading rsa-3.4.2-py2.py3-none-any.whl (46 kB)\n", "Collecting s3transfer<0.4.0,>=0.3.0\n", " Downloading s3transfer-0.3.3-py2.py3-none-any.whl (69 kB)\n", "Collecting colorama<0.4.4,>=0.2.5\n", " Downloading colorama-0.4.3-py2.py3-none-any.whl (15 kB)\n", "Collecting pybind11>=2.2.3\n", " Downloading pybind11-2.5.0-py2.py3-none-any.whl (296 kB)\n", "Collecting psutil\n", " Downloading psutil-5.7.0.tar.gz (449 kB)\n", "Collecting scipy>=0.17.0\n", " Downloading scipy-1.4.1-cp37-cp37m-manylinux1_x86_64.whl (26.1 MB)\n", "Collecting MarkupSafe>=0.23\n", " Downloading MarkupSafe-1.1.1-cp37-cp37m-manylinux1_x86_64.whl (27 kB)\n", "Collecting cryptography\n", " Downloading cryptography-2.9.2-cp35-abi3-manylinux2010_x86_64.whl (2.7 MB)\n", "Collecting zipp>=0.5\n", " Downloading zipp-3.1.0-py3-none-any.whl (4.9 kB)\n", "Collecting jmespath<1.0.0,>=0.7.1\n", " Downloading jmespath-0.9.5-py2.py3-none-any.whl (24 kB)\n", "Collecting pyasn1>=0.1.3\n", " Downloading pyasn1-0.4.8-py2.py3-none-any.whl (77 kB)\n", "Collecting cffi!=1.11.3,>=1.8\n", " Downloading cffi-1.14.0-cp37-cp37m-manylinux1_x86_64.whl (400 kB)\n", "Collecting pycparser\n", " Downloading pycparser-2.20-py2.py3-none-any.whl (112 kB)\n", "Building wheels for collected packages: scispacy, en-core-sci-sm, Flask-OpenTracing, jaeger-client, prometheus-client, opentracing, awscli, threadloop, thrift, tornado, PyYAML, psutil\n", " Building wheel for scispacy (setup.py): started\n", " Building wheel for scispacy (setup.py): finished with status 'done'\n", " Created wheel for scispacy: filename=scispacy-0.2.4-py3-none-any.whl size=35203 sha256=07f2ddde89b8d1009cebc8a9bc8e00c2025f46494c1681da832a64c7b66175dc\n", " Stored in directory: /root/.cache/pip/wheels/96/24/54/8c2bf5a6804275431a74bd256821500b3f2911d9ba8470a846\n", " Building wheel for en-core-sci-sm (setup.py): started\n", " Building wheel for en-core-sci-sm (setup.py): finished with status 'done'\n", " Created wheel for en-core-sci-sm: filename=en_core_sci_sm-0.2.4-py3-none-any.whl size=17161107 sha256=ef8509cb3f64ec67b72a2d63e8f265b4d9ffa8a4e3f7fcc8e1f7c779cb97c8bf\n", " Stored in directory: /root/.cache/pip/wheels/89/85/86/61e55599e443157de7b74ce7a016c417173a9876c67a2aa5ad\n", " Building wheel for Flask-OpenTracing (setup.py): started\n", " Building wheel for Flask-OpenTracing (setup.py): finished with status 'done'\n", " Created wheel for Flask-OpenTracing: filename=Flask_OpenTracing-1.1.0-py3-none-any.whl size=9070 sha256=71ae15e5f35eedf84a58caff672c1c4a7c583b4d59feb73716b9c12461b76096\n", " Stored in directory: /root/.cache/pip/wheels/42/22/cd/ccb93fa68f4a01fb6c10082f97bcb2af9eb8e43565ce38a292\n", " Building wheel for jaeger-client (setup.py): started\n", " Building wheel for jaeger-client (setup.py): finished with status 'done'\n", " Created wheel for jaeger-client: filename=jaeger_client-4.1.0-py3-none-any.whl size=64309 sha256=f980e8a5a3aed052c3fe6dbf1af8c536588ad1f64da0b737a597974f706856db\n", " Stored in directory: /root/.cache/pip/wheels/42/db/5b/826352aa72248553f4cc31bea3f40ec99a5e3e000f55151bb5\n", " Building wheel for prometheus-client (setup.py): started\n" ] }, { "name": "stdout", "output_type": "stream", "text": [ " Building wheel for prometheus-client (setup.py): finished with status 'done'\n", " Created wheel for prometheus-client: filename=prometheus_client-0.7.1-py3-none-any.whl size=41404 sha256=9944dc29951f63357e57768e1ca7938edc75af0c01342116ba0f066d82f5c425\n", " Stored in directory: /root/.cache/pip/wheels/30/0c/26/59ba285bf65dc79d195e9b25e2ddde4c61070422729b0cd914\n", " Building wheel for opentracing (setup.py): started\n", " Building wheel for opentracing (setup.py): finished with status 'done'\n", " Created wheel for opentracing: filename=opentracing-2.2.0-py3-none-any.whl size=49319 sha256=c3e5d398409a5370e6df7c55712cf1044094b33509d7aaa7024a09568f041612\n", " Stored in directory: /root/.cache/pip/wheels/9b/8e/ab/b38d1d257637e8837bb601c4e86b5ab9786889df757c2a4be4\n", " Building wheel for awscli (setup.py): started\n", " Building wheel for awscli (setup.py): finished with status 'done'\n", " Created wheel for awscli: filename=awscli-1.18.53-py2.py3-none-any.whl size=3024943 sha256=29113cc323b4eef9f5fdb6f70c01791b9460af38ad415ff756ea0cd8467def58\n", " Stored in directory: /root/.cache/pip/wheels/1d/fc/d1/b4fb07e85c2b0108f1b9a19fbf7de00d180fdc3fa6b621fd27\n", " Building wheel for threadloop (setup.py): started\n", " Building wheel for threadloop (setup.py): finished with status 'done'\n", " Created wheel for threadloop: filename=threadloop-1.0.2-py3-none-any.whl size=3423 sha256=b3eea8e7876b954fb98297ba9b253c1c5fb4b6474331e4b43782539614248af2\n", " Stored in directory: /root/.cache/pip/wheels/08/93/e3/037c2555d98964d9ca537dabb39827a2b72470a679b5c0de37\n", " Building wheel for thrift (setup.py): started\n", " Building wheel for thrift (setup.py): finished with status 'done'\n", " Created wheel for thrift: filename=thrift-0.13.0-py3-none-any.whl size=154885 sha256=069553dc1da60c33df6cb43d3686a907837b4a8a218c65c4e47976415e65697b\n", " Stored in directory: /root/.cache/pip/wheels/79/35/5a/19f5dadf91f62bd783aaa8385f700de9bc14772e09ab0f006a\n", " Building wheel for tornado (setup.py): started\n", " Building wheel for tornado (setup.py): finished with status 'done'\n", " Created wheel for tornado: filename=tornado-5.1.1-cp37-cp37m-linux_x86_64.whl size=463609 sha256=0448e80fa5fd2b410eea7f08431b680edd3e0795f5eb37dca490bc630dec9bae\n", " Stored in directory: /root/.cache/pip/wheels/83/91/4b/ee8ffb993d3372fc4129c52c9140792c118dda0373b41e7a8f\n", " Building wheel for PyYAML (setup.py): started\n", " Building wheel for PyYAML (setup.py): finished with status 'done'\n", " Created wheel for PyYAML: filename=PyYAML-5.3.1-cp37-cp37m-linux_x86_64.whl size=44619 sha256=f01dfe1cefcdd4a9fae7c6c8bfbbc6b57642d3b0235f8214fee8305e4b470d2c\n", " Stored in directory: /root/.cache/pip/wheels/5e/03/1e/e1e954795d6f35dfc7b637fe2277bff021303bd9570ecea653\n", " Building wheel for psutil (setup.py): started\n", " Building wheel for psutil (setup.py): finished with status 'done'\n", " Created wheel for psutil: filename=psutil-5.7.0-cp37-cp37m-linux_x86_64.whl size=281074 sha256=aae42694bace122502d414028d7730bf86acfa0817c21b01e1bd8e3ddcefb980\n", " Stored in directory: /root/.cache/pip/wheels/b6/e7/50/aee9cc966163d74430f13f208171dee22f11efa4a4a826661c\n", "Successfully built scispacy en-core-sci-sm Flask-OpenTracing jaeger-client prometheus-client opentracing awscli threadloop thrift tornado PyYAML psutil\n", "Installing collected packages: MarkupSafe, Jinja2, click, itsdangerous, Werkzeug, Flask, opentracing, Flask-OpenTracing, tornado, threadloop, six, thrift, jaeger-client, grpcio, pycparser, cffi, cryptography, chardet, urllib3, idna, certifi, requests, python-dateutil, azure-common, azure-storage-common, azure-storage-blob, protobuf, grpcio-opentracing, PyYAML, pyaml, Flask-cors, redis, numpy, gunicorn, pytz, configparser, minio, prometheus-client, flatbuffers, seldon-core, zipp, importlib-metadata, catalogue, tqdm, cymem, blis, wasabi, murmurhash, preshed, plac, srsly, thinc, spacy, docutils, jmespath, botocore, pyasn1, rsa, s3transfer, colorama, awscli, conllu, joblib, pybind11, psutil, nmslib, scipy, scikit-learn, pysbd, scispacy, en-core-sci-sm\n", "Successfully installed Flask-1.1.2 Flask-OpenTracing-1.1.0 Flask-cors-3.0.8 Jinja2-2.11.2 MarkupSafe-1.1.1 PyYAML-5.3.1 Werkzeug-1.0.1 awscli-1.18.53 azure-common-1.1.25 azure-storage-blob-2.1.0 azure-storage-common-2.1.0 blis-0.4.1 botocore-1.16.3 catalogue-1.0.0 certifi-2020.4.5.1 cffi-1.14.0 chardet-3.0.4 click-7.1.2 colorama-0.4.3 configparser-5.0.0 conllu-2.3.2 cryptography-2.9.2 cymem-2.0.3 docutils-0.15.2 en-core-sci-sm-0.2.4 flatbuffers-1.12 grpcio-1.28.1 grpcio-opentracing-1.1.4 gunicorn-20.0.4 idna-2.9 importlib-metadata-1.6.0 itsdangerous-1.1.0 jaeger-client-4.1.0 jmespath-0.9.5 joblib-0.14.1 minio-5.0.10 murmurhash-1.0.2 nmslib-2.0.6 numpy-1.18.4 opentracing-2.2.0 plac-1.1.3 preshed-3.0.2 prometheus-client-0.7.1 protobuf-3.11.3 psutil-5.7.0 pyaml-19.12.0 pyasn1-0.4.8 pybind11-2.5.0 pycparser-2.20 pysbd-0.2.3 python-dateutil-2.8.1 pytz-2020.1 redis-3.5.0 requests-2.23.0 rsa-3.4.2 s3transfer-0.3.3 scikit-learn-0.22.2.post1 scipy-1.4.1 scispacy-0.2.4 seldon-core-1.1.0 six-1.14.0 spacy-2.2.4 srsly-1.0.2 thinc-7.4.0 threadloop-1.0.2 thrift-0.13.0 tornado-5.1.1 tqdm-4.46.0 urllib3-1.25.9 wasabi-0.6.0 zipp-3.1.0\n", "\u001b[91mWARNING: You are using pip version 20.0.2; however, version 20.1 is available.\n", "You should consider upgrading via the '/usr/local/bin/python -m pip install --upgrade pip' command.\n", "\u001b[0mRemoving intermediate container 81d6c92a2adc\n", " ---> 639a465a9aaa\n", "Step 6/11 : EXPOSE 5000\n", " ---> Running in 1d473bc20890\n", "Removing intermediate container 1d473bc20890\n", " ---> f987b87626e2\n", "Step 7/11 : ENV MODEL_NAME scispacymodel\n", " ---> Running in 8b312ac729b8\n", "Removing intermediate container 8b312ac729b8\n", " ---> ac9e497efc6f\n", "Step 8/11 : ENV API_TYPE GRPC\n", " ---> Running in b497e10e5cca\n", "Removing intermediate container b497e10e5cca\n", " ---> 3d8fd1b2117d\n", "Step 9/11 : ENV SERVICE_TYPE MODEL\n", " ---> Running in 7387cfad035d\n", "Removing intermediate container 7387cfad035d\n", " ---> a89f9b6e4df3\n", "Step 10/11 : ENV PERSISTENCE 0\n", " ---> Running in d3e186558b37\n", "Removing intermediate container d3e186558b37\n", " ---> 94e8cf7a3601\n", "Step 11/11 : CMD exec seldon-core-microservice $MODEL_NAME $API_TYPE --service-type $SERVICE_TYPE --persistence $PERSISTENCE\n", " ---> Running in 0302dc819a21\n", "Removing intermediate container 0302dc819a21\n", " ---> 4926a8ac13e2\n", "Successfully built 4926a8ac13e2\n", "Successfully tagged scispacymodel:2.0\n" ] } ], "source": [ "!docker build ./prediction-image/ -t scispacymodel-grpc:1.0" ] }, { "cell_type": "code", "execution_count": 141, "metadata": { "ExecuteTime": { "end_time": "2020-05-06T18:28:46.046625Z", "start_time": "2020-05-06T18:28:45.619321Z" } }, "outputs": [ { "name": "stdout", "output_type": "stream", "text": [ "REPOSITORY TAG IMAGE ID CREATED SIZE\r\n", "scispacymodel-grpc 1.0 7250ebc38f21 About an hour ago 1GB\r\n", "shahanesanket/scispacymodel-grpc 1.0 7250ebc38f21 About an hour ago 1GB\r\n", "scispacymodel-rest 1.0 e05b1e7c564f About an hour ago 1GB\r\n", "<none> <none> 4a1760ab0c48 13 hours ago 1GB\r\n", "<none> <none> e92d02bcd74f 13 hours ago 270MB\r\n", "<none> <none> 6099bf120212 13 hours ago 179MB\r\n", "<none> <none> af275b16a0dc 13 hours ago 179MB\r\n", "ai-workshop-docker.ci-artifactory.lucidworks.com/queryclassifier 1.1 c86a1689d38c 4 weeks ago 692MB\r\n", "queryclassifier 1.0 c86a1689d38c 4 weeks ago 692MB\r\n", "queryclassifier-rest 1.0 12a6851ccb85 4 weeks ago 692MB\r\n", "<none> <none> 559ec21d3288 4 weeks ago 692MB\r\n", "<none> <none> 6bbc6cd0c4d1 4 weeks ago 692MB\r\n", "ai-workshop-docker.ci-artifactory.lucidworks.com/diabetes-model-sanket 1.0 e70ce1accf5b 2 months ago 2.25GB\r\n", "diabetes-model 1.0 e70ce1accf5b 2 months ago 2.25GB\r\n", "preview-generator 1.0 a3d1230c1ca9 3 months ago 1.51GB\r\n", "spacy-docker-build 1.0 11d3d2ae974a 3 months ago 456MB\r\n", "spacy-pretrained-entity-extraction 1.0 7e589a7d5551 3 months ago 1.79GB\r\n", "fusion-dev-docker.ci-artifactory.lucidworks.com/spacy-pretrained-entity-extraction 1.0 7e589a7d5551 3 months ago 1.79GB\r\n", "python 3.7-slim 41fc79494704 3 months ago 179MB\r\n", "ubuntu 16.04 96da9143fb18 3 months ago 124MB\r\n", "spam-classifier 1.0 49c5e0fd5f19 3 months ago 1.81GB\r\n", "toxic-classifier 1.0 0c6473e76218 4 months ago 1.88GB\r\n", "symspellapi latest e594a4b4b60d 8 months ago 262MB\r\n", "mcr.microsoft.com/dotnet/core/sdk 2.2 08657316a4cd 8 months ago 1.74GB\r\n", "mcr.microsoft.com/dotnet/core/aspnet 2.2 34973cab5999 8 months ago 260MB\r\n", "seldonio/seldon-core-s2i-python3 0.8 2399b47c7838 11 months ago 1.65GB\r\n" ] } ], "source": [ "!docker images" ] }, { "cell_type": "code", "execution_count": 122, "metadata": { "ExecuteTime": { "end_time": "2020-05-06T16:42:31.395405Z", "start_time": "2020-05-06T16:42:31.206284Z" } }, "outputs": [], "source": [ "!docker tag scispacymodel-grpc:1.0 shahanesanket/scispacymodel-grpc:1.0" ] }, { "cell_type": "code", "execution_count": 124, "metadata": { "ExecuteTime": { "end_time": "2020-05-06T16:56:21.190377Z", "start_time": "2020-05-06T16:51:45.232044Z" }, "scrolled": true }, "outputs": [ { "name": "stdout", "output_type": "stream", "text": [ "The push refers to repository [docker.io/shahanesanket/scispacymodel]\n", "\n", "\u001b[1B3e75ba84: Preparing \n", "\u001b[1B18e3e54a: Preparing \n", "\u001b[1B1d6b595f: Preparing \n", "\u001b[1Baf49aee4: Preparing \n", "\u001b[1Bd7f5b03a: Preparing \n", "\u001b[1Bf2f27444: Preparing \n", "\u001b[1Bf398d4bd: Preparing \n", "\u001b[8B3e75ba84: Pushed 641.3MB/627.9MBA\u001b[2K\u001b[8A\u001b[2K\u001b[4A\u001b[2K\u001b[8A\u001b[2K\u001b[3A\u001b[2K\u001b[2A\u001b[2K\u001b[8A\u001b[2K\u001b[7A\u001b[2K\u001b[1A\u001b[2K\u001b[8A\u001b[2K\u001b[6A\u001b[2K\u001b[8A\u001b[2K\u001b[8A\u001b[2K\u001b[8A\u001b[2K\u001b[7A\u001b[2K\u001b[8A\u001b[2K\u001b[7A\u001b[2K\u001b[8A\u001b[2K\u001b[8A\u001b[2K\u001b[7A\u001b[2K\u001b[8A\u001b[2K\u001b[8A\u001b[2K\u001b[7A\u001b[2K\u001b[8A\u001b[2K\u001b[7A\u001b[2K\u001b[8A\u001b[2K\u001b[8A\u001b[2K\u001b[7A\u001b[2K\u001b[8A\u001b[2K\u001b[8A\u001b[2K\u001b[7A\u001b[2K\u001b[8A\u001b[2K\u001b[8A\u001b[2K\u001b[7A\u001b[2K\u001b[8A\u001b[2K\u001b[7A\u001b[2K\u001b[8A\u001b[2K\u001b[8A\u001b[2K\u001b[8A\u001b[2K\u001b[7A\u001b[2K\u001b[8A\u001b[2K\u001b[7A\u001b[2K\u001b[8A\u001b[2K\u001b[8A\u001b[2K\u001b[8A\u001b[2K\u001b[7A\u001b[2K\u001b[8A\u001b[2K\u001b[7A\u001b[2K\u001b[8A\u001b[2K\u001b[7A\u001b[2K\u001b[7A\u001b[2K\u001b[8A\u001b[2K\u001b[8A\u001b[2K\u001b[7A\u001b[2K\u001b[8A\u001b[2K\u001b[7A\u001b[2K\u001b[8A\u001b[2K\u001b[7A\u001b[2K\u001b[8A\u001b[2K\u001b[7A\u001b[2K\u001b[8A\u001b[2K\u001b[7A\u001b[2K\u001b[8A\u001b[2K\u001b[7A\u001b[2K\u001b[8A\u001b[2K\u001b[8A\u001b[2K\u001b[7A\u001b[2K\u001b[8A\u001b[2K\u001b[7A\u001b[2K\u001b[8A\u001b[2K\u001b[7A\u001b[2K\u001b[7A\u001b[2K\u001b[8A\u001b[2K\u001b[8A\u001b[2K\u001b[7A\u001b[2K\u001b[8A\u001b[2K\u001b[7A\u001b[2K\u001b[8A\u001b[2K\u001b[7A\u001b[2K\u001b[8A\u001b[2K\u001b[7A\u001b[2K\u001b[8A\u001b[2K\u001b[7A\u001b[2K\u001b[7A\u001b[2K\u001b[7A\u001b[2K\u001b[8A\u001b[2K\u001b[8A\u001b[2K\u001b[7A\u001b[2K\u001b[7A\u001b[2K\u001b[8A\u001b[2K\u001b[7A\u001b[2K\u001b[7A\u001b[2K\u001b[8A\u001b[2K\u001b[7A\u001b[2K\u001b[8A\u001b[2K\u001b[8A\u001b[2K\u001b[7A\u001b[2K\u001b[7A\u001b[2K\u001b[8A\u001b[2K\u001b[7A\u001b[2K\u001b[8A\u001b[2K\u001b[7A\u001b[2K\u001b[8A\u001b[2K\u001b[7A\u001b[2K\u001b[8A\u001b[2K\u001b[7A\u001b[2K\u001b[7A\u001b[2K\u001b[8A\u001b[2K\u001b[7A\u001b[2K\u001b[8A\u001b[2K\u001b[7A\u001b[2K\u001b[8A\u001b[2K\u001b[7A\u001b[2K\u001b[8A\u001b[2K\u001b[7A\u001b[2K\u001b[8A\u001b[2K\u001b[7A\u001b[2K\u001b[8A\u001b[2K\u001b[7A\u001b[2K\u001b[8A\u001b[2K\u001b[7A\u001b[2K\u001b[8A\u001b[2K\u001b[8A\u001b[2K\u001b[7A\u001b[2K\u001b[8A\u001b[2K\u001b[7A\u001b[2K\u001b[8A\u001b[2K\u001b[7A\u001b[2K\u001b[8A\u001b[2K\u001b[7A\u001b[2K\u001b[8A\u001b[2K\u001b[8A\u001b[2K\u001b[8A\u001b[2K\u001b[8A\u001b[2K\u001b[7A\u001b[2K\u001b[8A\u001b[2K\u001b[7A\u001b[2K\u001b[8A\u001b[2K\u001b[7A\u001b[2K\u001b[8A\u001b[2K\u001b[7A\u001b[2K\u001b[7A\u001b[2K\u001b[8A\u001b[2K\u001b[7A\u001b[2K\u001b[7A\u001b[2K\u001b[8A\u001b[2K\u001b[7A\u001b[2K\u001b[8A\u001b[2K\u001b[7A\u001b[2K\u001b[8A\u001b[2K\u001b[7A\u001b[2K\u001b[7A\u001b[2K\u001b[7A\u001b[2K\u001b[8A\u001b[2K\u001b[7A\u001b[2K\u001b[7A\u001b[2K\u001b[7A\u001b[2K\u001b[7A\u001b[2K\u001b[8A\u001b[2K\u001b[7A\u001b[2K\u001b[8A\u001b[2K\u001b[7A\u001b[2K\u001b[7A\u001b[2K\u001b[7A\u001b[2K\u001b[8A\u001b[2K\u001b[7A\u001b[2K\u001b[8A\u001b[2K\u001b[7A\u001b[2K\u001b[7A\u001b[2K\u001b[8A\u001b[2K\u001b[7A\u001b[2K\u001b[8A\u001b[2K\u001b[7A\u001b[2K\u001b[7A\u001b[2K\u001b[8A\u001b[2K\u001b[7A\u001b[2K\u001b[8A\u001b[2K\u001b[7A\u001b[2K\u001b[7A\u001b[2K\u001b[8A\u001b[2K\u001b[7A\u001b[2K\u001b[8A\u001b[2K\u001b[7A\u001b[2K\u001b[7A\u001b[2K\u001b[7A\u001b[2K\u001b[8A\u001b[2K\u001b[7A\u001b[2K\u001b[8A\u001b[2K\u001b[7A\u001b[2K\u001b[8A\u001b[2K\u001b[7A\u001b[2K\u001b[8A\u001b[2K\u001b[7A\u001b[2K\u001b[7A\u001b[2K\u001b[8A\u001b[2K\u001b[7A\u001b[2K\u001b[7A\u001b[2K\u001b[8A\u001b[2K\u001b[7A\u001b[2K\u001b[8A\u001b[2K\u001b[7A\u001b[2K\u001b[8A\u001b[2K\u001b[7A\u001b[2K\u001b[7A\u001b[2K\u001b[8A\u001b[2K\u001b[7A\u001b[2K\u001b[8A\u001b[2K\u001b[7A\u001b[2K\u001b[8A\u001b[2K\u001b[7A\u001b[2K\u001b[8A\u001b[2K\u001b[7A\u001b[2K\u001b[7A\u001b[2K\u001b[8A\u001b[2K\u001b[7A\u001b[2K\u001b[8A\u001b[2K\u001b[7A\u001b[2K\u001b[8A\u001b[2K\u001b[7A\u001b[2K\u001b[8A\u001b[2K\u001b[7A\u001b[2K\u001b[8A\u001b[2K\u001b[7A\u001b[2K\u001b[8A\u001b[2K\u001b[7A\u001b[2K\u001b[8A\u001b[2K\u001b[7A\u001b[2K\u001b[8A\u001b[2K\u001b[7A\u001b[2K\u001b[7A\u001b[2K\u001b[7A\u001b[2K\u001b[8A\u001b[2K\u001b[7A\u001b[2K\u001b[8A\u001b[2K\u001b[7A\u001b[2K\u001b[8A\u001b[2K\u001b[7A\u001b[2K\u001b[8A\u001b[2K\u001b[7A\u001b[2K\u001b[8A\u001b[2K\u001b[7A\u001b[2K\u001b[8A\u001b[2K\u001b[7A\u001b[2K\u001b[7A\u001b[2K\u001b[8A\u001b[2K\u001b[8A\u001b[2K\u001b[7A\u001b[2K\u001b[8A\u001b[2K\u001b[7A\u001b[2K\u001b[8A\u001b[2K\u001b[7A\u001b[2K\u001b[7A\u001b[2K\u001b[8A\u001b[2K\u001b[8A\u001b[2K\u001b[7A\u001b[2K\u001b[7A\u001b[2K\u001b[8A\u001b[2K\u001b[7A\u001b[2K\u001b[8A\u001b[2K\u001b[7A\u001b[2K\u001b[8A\u001b[2K\u001b[7A\u001b[2K\u001b[8A\u001b[2K\u001b[7A\u001b[2K\u001b[8A\u001b[2K\u001b[7A\u001b[2K\u001b[8A\u001b[2K\u001b[7A\u001b[2K\u001b[7A\u001b[2K\u001b[7A\u001b[2K\u001b[8A\u001b[2K\u001b[8A\u001b[2K\u001b[7A\u001b[2K\u001b[7A\u001b[2K\u001b[8A\u001b[2K\u001b[7A\u001b[2K\u001b[8A\u001b[2K\u001b[7A\u001b[2K\u001b[7A\u001b[2K\u001b[7A\u001b[2K\u001b[8A\u001b[2K\u001b[7A\u001b[2K\u001b[8A\u001b[2K\u001b[7A\u001b[2K\u001b[7A\u001b[2K\u001b[7A\u001b[2K\u001b[8A\u001b[2K\u001b[7A\u001b[2K\u001b[8A\u001b[2K\u001b[7A\u001b[2K\u001b[8A\u001b[2K\u001b[7A\u001b[2K\u001b[7A\u001b[2K\u001b[8A\u001b[2K\u001b[7A\u001b[2K\u001b[7A\u001b[2K\u001b[8A\u001b[2K\u001b[7A\u001b[2K\u001b[8A\u001b[2K\u001b[7A\u001b[2K\u001b[8A\u001b[2K\u001b[7A\u001b[2K\u001b[8A\u001b[2K\u001b[7A\u001b[2K\u001b[8A\u001b[2K\u001b[7A\u001b[2K\u001b[7A\u001b[2K\u001b[8A\u001b[2K\u001b[7A\u001b[2K\u001b[8A\u001b[2K\u001b[8A\u001b[2K\u001b[7A\u001b[2K\u001b[8A\u001b[2K\u001b[7A\u001b[2K\u001b[7A\u001b[2K\u001b[7A\u001b[2K\u001b[8A\u001b[2K\u001b[7A\u001b[2K\u001b[8A\u001b[2K\u001b[7A\u001b[2K\u001b[8A\u001b[2K\u001b[7A\u001b[2K\u001b[8A\u001b[2K\u001b[8A\u001b[2K\u001b[7A\u001b[2K\u001b[7A\u001b[2K\u001b[8A\u001b[2K\u001b[7A\u001b[2K\u001b[7A\u001b[2K\u001b[8A\u001b[2K\u001b[7A\u001b[2K\u001b[8A\u001b[2K\u001b[7A\u001b[2K\u001b[8A\u001b[2K\u001b[7A\u001b[2K\u001b[7A\u001b[2K\u001b[8A\u001b[2K\u001b[7A\u001b[2K\u001b[7A\u001b[2K\u001b[8A\u001b[2K\u001b[7A\u001b[2K\u001b[7A\u001b[2K\u001b[8A\u001b[2K\u001b[8A\u001b[2K\u001b[7A\u001b[2K\u001b[8A\u001b[2K\u001b[7A\u001b[2K\u001b[7A\u001b[2K\u001b[8A\u001b[2K\u001b[7A\u001b[2KPushing 168.5MB/197.3MB\u001b[7A\u001b[2K\u001b[8A\u001b[2K\u001b[7A\u001b[2K\u001b[8A\u001b[2K\u001b[7A\u001b[2K\u001b[7A\u001b[2K\u001b[8A\u001b[2K\u001b[7A\u001b[2K\u001b[7A\u001b[2K\u001b[8A\u001b[2K\u001b[7A\u001b[2K\u001b[8A\u001b[2K\u001b[7A\u001b[2K\u001b[8A\u001b[2K\u001b[7A\u001b[2K\u001b[8A\u001b[2K\u001b[7A\u001b[2K\u001b[7A\u001b[2K\u001b[8A\u001b[2K\u001b[7A\u001b[2K\u001b[8A\u001b[2K\u001b[7A\u001b[2K\u001b[7A\u001b[2K\u001b[7A\u001b[2K\u001b[8A\u001b[2K\u001b[7A\u001b[2K\u001b[7A\u001b[2K\u001b[8A\u001b[2K\u001b[7A\u001b[2K\u001b[8A\u001b[2K\u001b[7A\u001b[2K\u001b[7A\u001b[2K\u001b[7A\u001b[2K\u001b[8A\u001b[2K\u001b[8A\u001b[2K\u001b[8A\u001b[2K\u001b[8A\u001b[2K\u001b[8A\u001b[2K\u001b[8A\u001b[2K\u001b[8A\u001b[2K\u001b[8A\u001b[2K\u001b[8A\u001b[2K\u001b[8A\u001b[2K\u001b[8A\u001b[2K\u001b[8A\u001b[2K\u001b[8A\u001b[2K\u001b[7A\u001b[2K\u001b[8A\u001b[2K\u001b[8A\u001b[2K\u001b[8A\u001b[2K\u001b[8A\u001b[2K\u001b[8A\u001b[2K\u001b[8A\u001b[2K\u001b[8A\u001b[2K\u001b[8A\u001b[2K\u001b[8A\u001b[2K\u001b[8A\u001b[2K\u001b[8A\u001b[2K\u001b[8A\u001b[2K\u001b[8A\u001b[2K\u001b[8A\u001b[2K\u001b[8A\u001b[2K\u001b[8A\u001b[2K\u001b[8A\u001b[2K\u001b[8A\u001b[2K\u001b[8A\u001b[2K\u001b[8A\u001b[2K\u001b[8A\u001b[2K\u001b[8A\u001b[2K\u001b[8A\u001b[2K\u001b[8A\u001b[2K\u001b[8A\u001b[2K\u001b[8A\u001b[2K\u001b[8A\u001b[2K\u001b[8A\u001b[2K\u001b[8A\u001b[2K\u001b[8A\u001b[2K\u001b[8A\u001b[2K\u001b[8A\u001b[2K\u001b[8A\u001b[2K\u001b[8A\u001b[2K\u001b[8A\u001b[2K\u001b[8A\u001b[2K\u001b[8A\u001b[2K\u001b[8A\u001b[2K\u001b[8A\u001b[2K\u001b[8A\u001b[2K\u001b[8A\u001b[2K\u001b[8A\u001b[2K\u001b[8A\u001b[2K\u001b[8A\u001b[2K\u001b[8A\u001b[2K\u001b[8A\u001b[2K\u001b[8A\u001b[2K\u001b[8A\u001b[2K\u001b[8A\u001b[2K\u001b[8A\u001b[2K\u001b[8A\u001b[2K\u001b[8A\u001b[2K\u001b[8A\u001b[2K\u001b[8A\u001b[2K\u001b[8A\u001b[2K\u001b[8A\u001b[2K\u001b[8A\u001b[2K\u001b[8A\u001b[2K\u001b[8A\u001b[2K\u001b[8A\u001b[2K\u001b[8A\u001b[2K\u001b[8A\u001b[2K\u001b[8A\u001b[2K\u001b[8A\u001b[2K\u001b[8A\u001b[2K\u001b[8A\u001b[2K\u001b[8A\u001b[2K\u001b[8A\u001b[2K\u001b[8A\u001b[2K\u001b[8A\u001b[2K\u001b[8A\u001b[2K\u001b[8A\u001b[2K\u001b[8A\u001b[2K\u001b[8A\u001b[2K\u001b[8A\u001b[2K\u001b[8A\u001b[2K\u001b[8A\u001b[2K\u001b[8A\u001b[2K\u001b[8A\u001b[2K\u001b[8A\u001b[2K\u001b[8A\u001b[2K\u001b[8A\u001b[2K\u001b[8A\u001b[2K\u001b[8A\u001b[2K\u001b[8A\u001b[2K\u001b[8A\u001b[2K\u001b[8A\u001b[2K\u001b[8A\u001b[2K\u001b[8A\u001b[2K\u001b[8A\u001b[2K\u001b[8A\u001b[2K\u001b[8A\u001b[2K\u001b[8A\u001b[2K\u001b[8A\u001b[2K\u001b[8A\u001b[2K\u001b[8A\u001b[2K\u001b[8A\u001b[2K\u001b[8A\u001b[2K\u001b[8A\u001b[2K\u001b[8A\u001b[2K\u001b[8A\u001b[2K\u001b[8A\u001b[2K\u001b[8A\u001b[2K\u001b[8A\u001b[2K\u001b[8A\u001b[2K\u001b[8A\u001b[2K\u001b[8A\u001b[2K\u001b[8A\u001b[2K\u001b[8A\u001b[2K\u001b[8A\u001b[2K\u001b[8A\u001b[2K\u001b[8A\u001b[2K\u001b[8A\u001b[2K\u001b[8A\u001b[2K\u001b[8A\u001b[2K\u001b[8A\u001b[2K\u001b[8A\u001b[2K\u001b[8A\u001b[2K\u001b[8A\u001b[2K\u001b[8A\u001b[2K\u001b[8A\u001b[2K\u001b[8A\u001b[2K\u001b[8A\u001b[2K\u001b[8A\u001b[2K\u001b[8A\u001b[2K\u001b[8A\u001b[2K\u001b[8A\u001b[2K\u001b[8A\u001b[2K\u001b[8A\u001b[2K\u001b[8A\u001b[2K\u001b[8A\u001b[2KPushing 331.6MB/627.9MB\u001b[8A\u001b[2K\u001b[8A\u001b[2K\u001b[8A\u001b[2K\u001b[8A\u001b[2K\u001b[8A\u001b[2K\u001b[8A\u001b[2K\u001b[8A\u001b[2K\u001b[8A\u001b[2K\u001b[8A\u001b[2K\u001b[8A\u001b[2K\u001b[8A\u001b[2K\u001b[8A\u001b[2K\u001b[8A\u001b[2K\u001b[8A\u001b[2K\u001b[8A\u001b[2K\u001b[8A\u001b[2K\u001b[8A\u001b[2K\u001b[8A\u001b[2K\u001b[8A\u001b[2K\u001b[8A\u001b[2K\u001b[8A\u001b[2K\u001b[8A\u001b[2K\u001b[8A\u001b[2K\u001b[8A\u001b[2K\u001b[8A\u001b[2K\u001b[8A\u001b[2K\u001b[8A\u001b[2K\u001b[8A\u001b[2K\u001b[8A\u001b[2K\u001b[8A\u001b[2K\u001b[8A\u001b[2K\u001b[8A\u001b[2K\u001b[8A\u001b[2K\u001b[8A\u001b[2K\u001b[8A\u001b[2K\u001b[8A\u001b[2K\u001b[8A\u001b[2K\u001b[8A\u001b[2K\u001b[8A\u001b[2K\u001b[8A\u001b[2K\u001b[8A\u001b[2K\u001b[8A\u001b[2K\u001b[8A\u001b[2K\u001b[8A\u001b[2K\u001b[8A\u001b[2K\u001b[8A\u001b[2K\u001b[8A\u001b[2K\u001b[8A\u001b[2K\u001b[8A\u001b[2K\u001b[8A\u001b[2K\u001b[8A\u001b[2K\u001b[8A\u001b[2K\u001b[8A\u001b[2K\u001b[8A\u001b[2K\u001b[8A\u001b[2K\u001b[8A\u001b[2K\u001b[8A\u001b[2K\u001b[8A\u001b[2K\u001b[8A\u001b[2K\u001b[8A\u001b[2K\u001b[8A\u001b[2K\u001b[8A\u001b[2K\u001b[8A\u001b[2K\u001b[8A\u001b[2K\u001b[8A\u001b[2K\u001b[8A\u001b[2K\u001b[8A\u001b[2K\u001b[8A\u001b[2K\u001b[8A\u001b[2K\u001b[8A\u001b[2K\u001b[8A\u001b[2K\u001b[8A\u001b[2K\u001b[8A\u001b[2K\u001b[8A\u001b[2K\u001b[8A\u001b[2K\u001b[8A\u001b[2K\u001b[8A\u001b[2K\u001b[8A\u001b[2K\u001b[8A\u001b[2K\u001b[8A\u001b[2K\u001b[8A\u001b[2K\u001b[8A\u001b[2K\u001b[8A\u001b[2K\u001b[8A\u001b[2K\u001b[8A\u001b[2K\u001b[8A\u001b[2K\u001b[8A\u001b[2K\u001b[8A\u001b[2K\u001b[8A\u001b[2K\u001b[8A\u001b[2K\u001b[8A\u001b[2K\u001b[8A\u001b[2K\u001b[8A\u001b[2K\u001b[8A\u001b[2K\u001b[8A\u001b[2K\u001b[8A\u001b[2K\u001b[8A\u001b[2K\u001b[8A\u001b[2K\u001b[8A\u001b[2K\u001b[8A\u001b[2K\u001b[8A\u001b[2K\u001b[8A\u001b[2K\u001b[8A\u001b[2K\u001b[8A\u001b[2K\u001b[8A\u001b[2K\u001b[8A\u001b[2K\u001b[8A\u001b[2K\u001b[8A\u001b[2K\u001b[8A\u001b[2K\u001b[8A\u001b[2K\u001b[8A\u001b[2K\u001b[8A\u001b[2K\u001b[8A\u001b[2K\u001b[8A\u001b[2K\u001b[8A\u001b[2K\u001b[8A\u001b[2K\u001b[8A\u001b[2K\u001b[8A\u001b[2K\u001b[8A\u001b[2K\u001b[8A\u001b[2K\u001b[8A\u001b[2K\u001b[8A\u001b[2K\u001b[8A\u001b[2K\u001b[8A\u001b[2K\u001b[8A\u001b[2K\u001b[8A\u001b[2K\u001b[8A\u001b[2K\u001b[8A\u001b[2K\u001b[8A\u001b[2K\u001b[8A\u001b[2K\u001b[8A\u001b[2K\u001b[8A\u001b[2K\u001b[8A\u001b[2K\u001b[8A\u001b[2K\u001b[8A\u001b[2K\u001b[8A\u001b[2K\u001b[8A\u001b[2K\u001b[8A\u001b[2K\u001b[8A\u001b[2K\u001b[8A\u001b[2K\u001b[8A\u001b[2K\u001b[8A\u001b[2K\u001b[8A\u001b[2K\u001b[8A\u001b[2K\u001b[8A\u001b[2K\u001b[8A\u001b[2K\u001b[8A\u001b[2K\u001b[8A\u001b[2K\u001b[8A\u001b[2K\u001b[8A\u001b[2K\u001b[8A\u001b[2K\u001b[8A\u001b[2K\u001b[8A\u001b[2K\u001b[8A\u001b[2KPushing 597.5MB/627.9MB\u001b[8A\u001b[2K\u001b[8A\u001b[2K\u001b[8A\u001b[2K\u001b[8A\u001b[2K\u001b[8A\u001b[2K\u001b[8A\u001b[2K\u001b[8A\u001b[2K\u001b[8A\u001b[2K\u001b[8A\u001b[2K\u001b[8A\u001b[2K\u001b[8A\u001b[2K\u001b[8A\u001b[2K\u001b[8A\u001b[2K\u001b[8A\u001b[2K\u001b[8A\u001b[2K\u001b[8A\u001b[2K\u001b[8A\u001b[2K\u001b[8A\u001b[2K\u001b[8A\u001b[2K\u001b[8A\u001b[2K\u001b[8A\u001b[2KPushing 636.1MB\u001b[8A\u001b[2K\u001b[8A\u001b[2K\u001b[8A\u001b[2K\u001b[8A\u001b[2K\u001b[8A\u001b[2K2.0: digest: sha256:63cbf510ff081ed728e6ddf5e05bd2e74f2bea5351c4b1962572b6066b8a7bdc size: 2003\n" ] } ], "source": [ "!docker push shahanesanket/scispacymodel:2.0" ] }, { "cell_type": "code", "execution_count": 100, "metadata": { "ExecuteTime": { "end_time": "2020-05-06T06:09:41.303376Z", "start_time": "2020-05-06T06:09:40.996773Z" } }, "outputs": [ { "name": "stdout", "output_type": "stream", "text": [ "{\"data\":{\"names\":[\"entities\"],\"ndarray\":[[\"Background\",\"Felid herpesvirus 1\",\"FHV-1\",\"upper respiratory tract diseases\",\"cats\",\"nasal\",\"ocular discharge\",\"conjunctivitis\",\"oral ulceration\",\"nature\",\"severity\",\"disease\",\"clinical cases\",\"Genetic determinants\",\"virulence\",\"in vivo\",\"phenotype\",\"FHV-1\",\"isolates\",\"investigating\",\"FHV-1\",\"genetic diversity\",\"study\",\"next generation sequencing\",\"compare\",\"genomes\",\"contemporary\",\"Australian\",\"clinical isolates\",\"FHV-1\",\"vaccine\",\"isolates\",\"historical clinical isolates\",\"isolates\",\"introduction\",\"live attenuated vaccines\",\"Australia\",\"Analysis\",\"genome sequences\",\"assess\",\"level\",\"genetic diversity\",\"genetic markers\",\"influence\",\"in vivo\",\"phenotype\",\"isolates\",\"sequences\",\"evidence\",\"recombination\",\"genome sequences\",\"isolates\",\"FHV-1\",\"vaccine\",\"isolates\",\"clinical isolates\",\"period\",\"years\",\"Analysis\",\"genome sequences\",\"low\",\"level\",\"diversity\",\"isolates\",\"genetic determinants\",\"virulence\",\"identified\",\"single nucleotide polymorphisms\",\"SNPs\",\"UL28\",\"UL44 genes\",\"detected\",\"vaccine\",\"isolates\",\"clinical isolates\",\"FHV-1\",\"recombination\",\"detected\",\"multiple methods\",\"recombination\",\"detection\",\"isolates\",\"originated\",\"cats\",\"housed\",\"shelter environment\",\"infective pressures\",\"Evidence\",\"displacement\",\"dominant\",\"FHV-1\",\"isolates\",\"FHV-1\",\"isolates\",\"time\",\"isolates\",\"shelter-housed animals\",\"results\",\"FHV-1\",\"genomes\",\"recombination\",\"detected\",\"FHV-1\",\"genomes\",\"risk\",\"attenuated vaccines\",\"virulent field viruses\",\"herpesviruses\",\"SNPs\",\"detected\",\"vaccine\",\"isolates\",\"PCR-based methods\",\"differentiating vaccine\",\"clinical isolates\",\"FHV-1\",\"epidemiological studies\"]]},\"meta\":{}}\r\n" ] } ], "source": [ "!curl -g http://localhost:5000/predict --data-urlencode 'json={\"data\": {\"names\": [\"message\"], \"ndarray\": [\"Background: Felid herpesvirus 1 (FHV-1) causes upper respiratory tract diseases in cats worldwide, including nasal and ocular discharge, conjunctivitis and oral ulceration. The nature and severity of disease can vary between clinical cases. Genetic determinants of virulence are likely to contribute to differences in the in vivo phenotype of FHV-1 isolates, but to date there have been limited studies investigating FHV-1 genetic diversity. This study used next generation sequencing to compare the genomes of contemporary Australian clinical isolates of FHV-1, vaccine isolates and historical clinical isolates, including isolates that predated the introduction of live attenuated vaccines into Australia. Analysis of the genome sequences aimed to assess the level of genetic diversity, identify potential genetic markers that could influence the in vivo phenotype of the isolates and examine the sequences for evidence of recombination. Results: The full genome sequences of 26 isolates of FHV-1 were determined, including two vaccine isolates and 24 clinical isolates that were collected over a period of approximately 40 years. Analysis of the genome sequences revealed a remarkably low level of diversity (0.0-0.01 %) between the isolates. No potential genetic determinants of virulence were identified, but unique single nucleotide polymorphisms (SNPs) in the UL28 and UL44 genes were detected in the vaccine isolates that were not present in the clinical isolates. No evidence of FHV-1 recombination was detected using multiple methods of recombination detection, even though many of the isolates originated from cats housed in a shelter environment where high infective pressures were likely to exist. Evidence of displacement of dominant FHV-1 isolates with other (genetically distinct) FHV-1 isolates over time was observed amongst the isolates obtained from the shelter-housed animals. The results show that FHV-1 genomes are highly conserved. The lack of recombination detected in the FHV-1 genomes suggests that the risk of attenuated vaccines recombining to generate virulent field viruses is lower than has been suggested for some other herpesviruses. The SNPs detected only in the vaccine isolates offer the potential to develop PCR-based methods of differentiating vaccine and clinical isolates of FHV-1 in order to facilitate future epidemiological studies.\"]}}'" ] }, { "cell_type": "code", "execution_count": null, "metadata": {}, "outputs": [], "source": [] } ], "metadata": { "kernelspec": { "display_name": "Python 3", "language": "python", "name": "python3" }, "language_info": { "codemirror_mode": { "name": "ipython", "version": 3 }, "file_extension": ".py", "mimetype": "text/x-python", "name": "python", "nbconvert_exporter": "python", "pygments_lexer": "ipython3", "version": "3.6.5" } }, "nbformat": 4, "nbformat_minor": 2 } - Follow the steps in the notebook, substituting your custom values as needed.
Deploy model to Fusion
- Navigate to Collections > Jobs.
- Click the Add button.
-
Select the Create Seldon Core Model Deployment under Model Deployment Jobs.
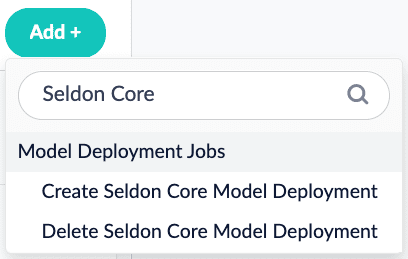
-
Enter the values for your model deployment. If you are using the pre-packaged model, use the following values:
Parameter Value Jobs ID scispacymodel-seldon-deploymentModel Name scispacymodelDocker Repository shahanesanketImage Name scispacymodel-grpc:1.0Output Column Names for Model [entities]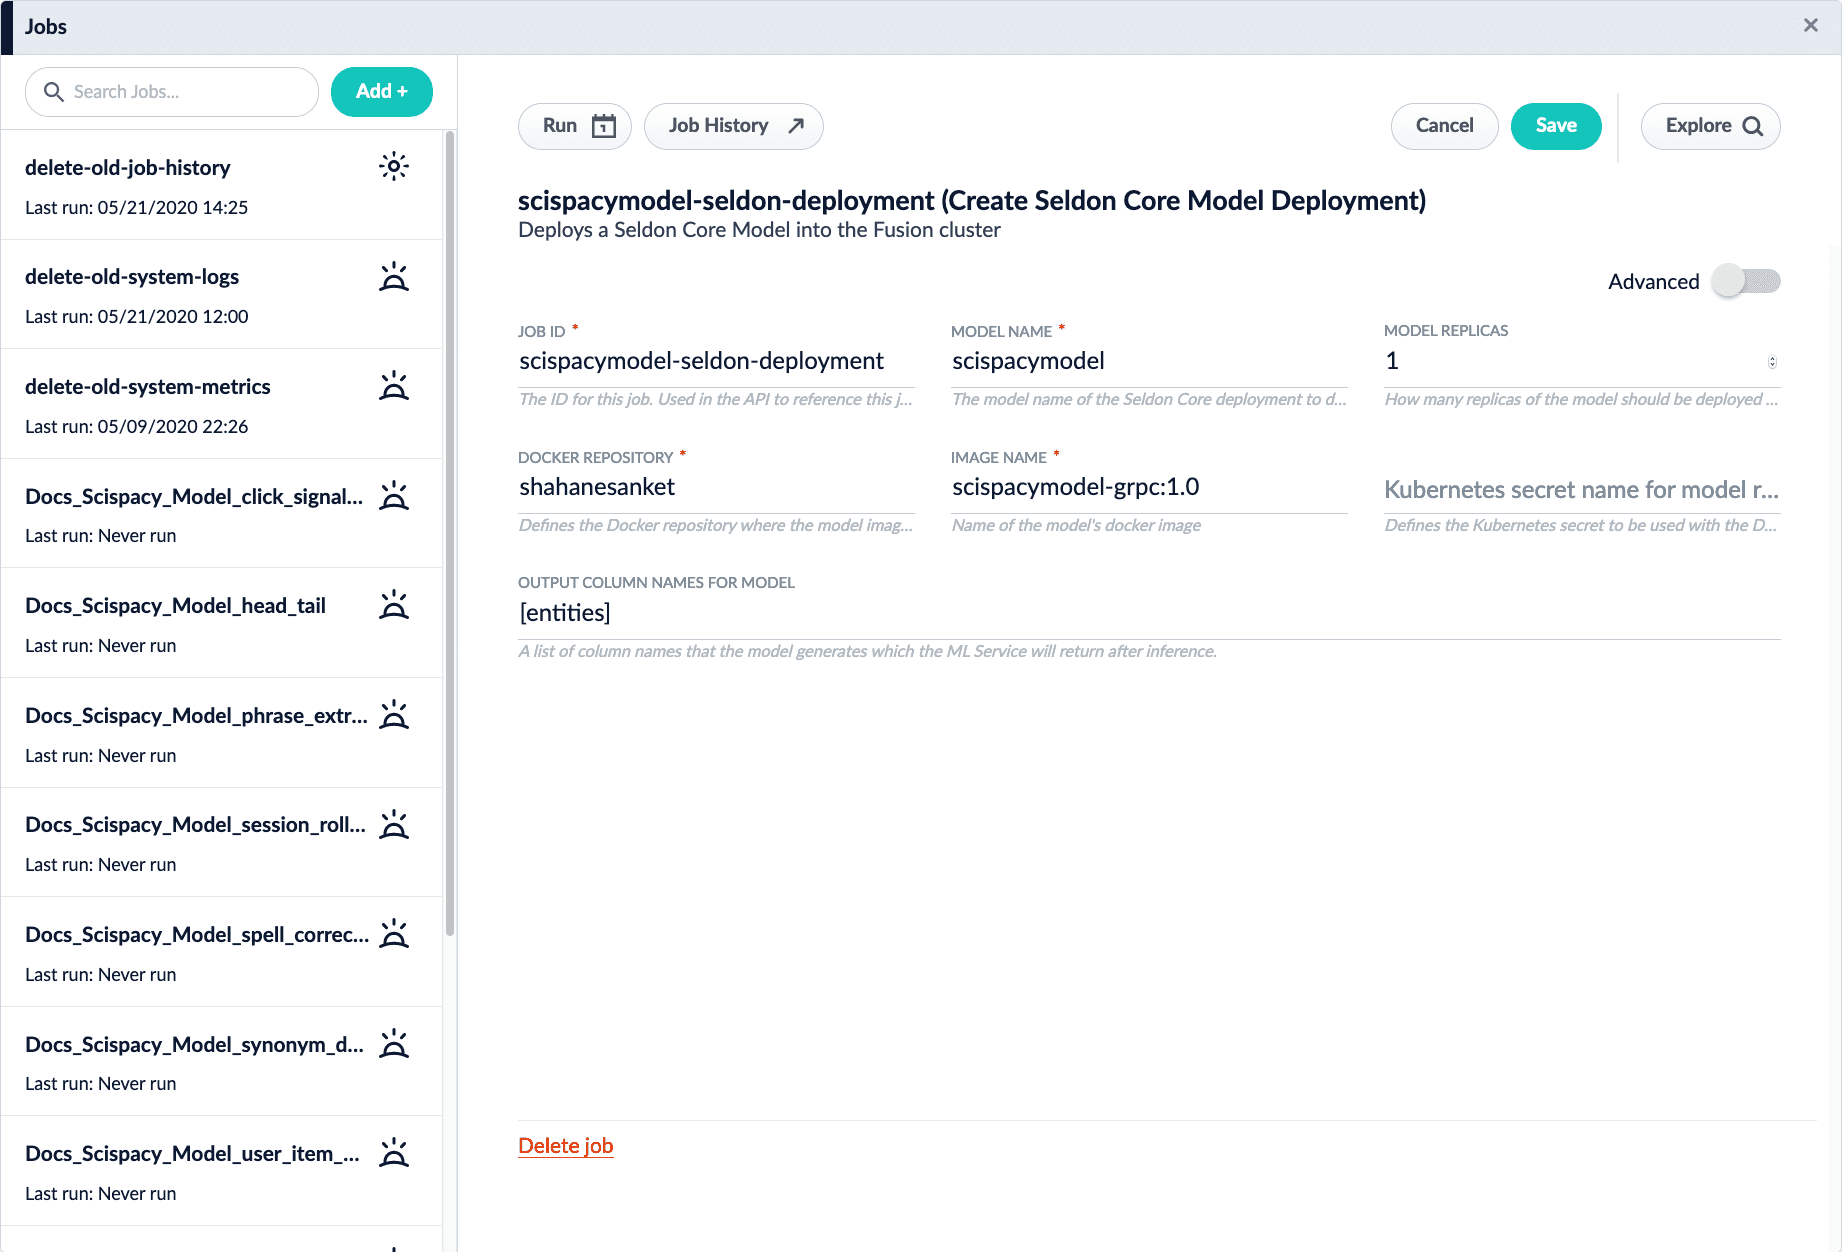
- Run the job by clicking Run and selecting Start.
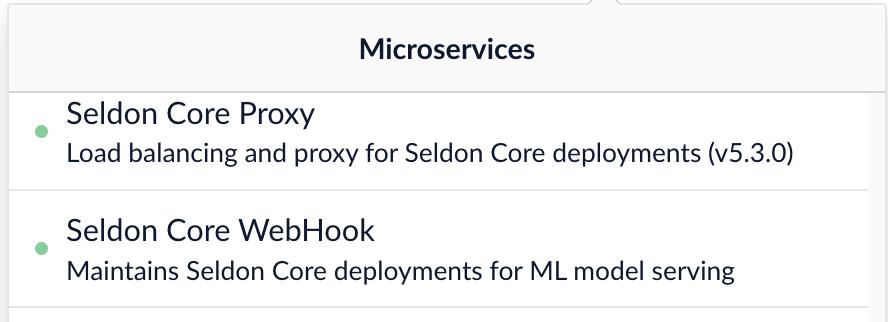
Import sample data
-
Download and save the sample data file
sampleJSON_body_content.csv. - Navigate to Indexing > Datasources.
-
Click the Add button and select File Upload V2.
-
Click Browse, select the
sampleJSON_body_content.csvfile, and click Open. Click the Upload File button to complete the upload process. -
Assign a value to the Datasource ID parameter. This article uses the ID
sample-data.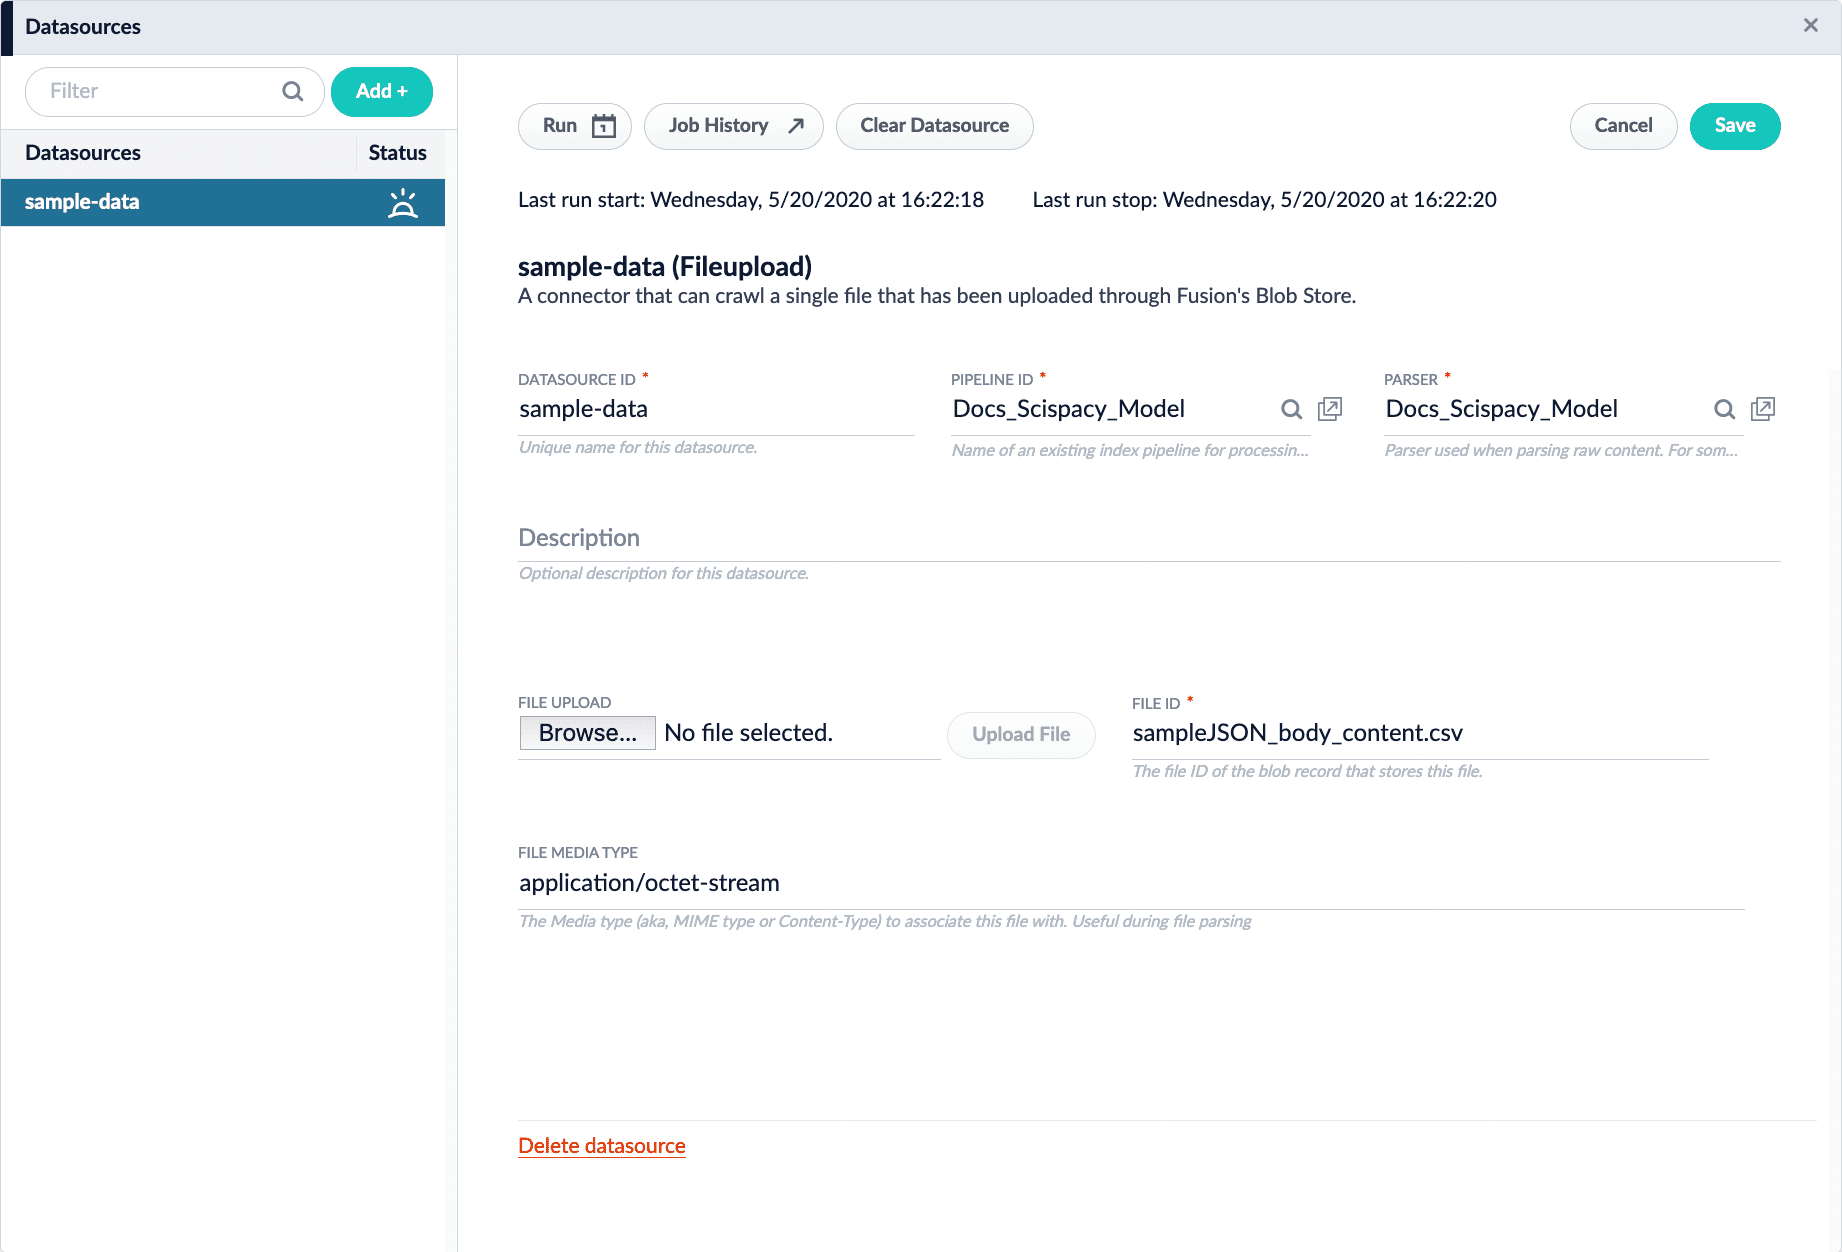
- Click the Save button.
Create a Machine Learning stage in the Index Workbench
- Navigate to Indexing > Index Workbench.
- Click the Load button.
- Choose the datasource you created.
- Click the Add a Stage button.
- Choose the Machine Learning stage.
-
In the Model ID field, enter
scispacymodel. -
In the Model input transformation script field, enter the following script:
var modelInput = new java.util.HashMap() var list = new java.util.ArrayList() list.add(doc.getFirstFieldValue("body_t")) modelInput.put("text", list) modelInput -
In the Model output transformation script field, enter the following script:
doc.addField("entities_ss", modelOutput.get("entities")) - Click the Apply button.
Verify results
-
Click the Start Job button, and allow the job to finish.

-
Check the simulated results. If everything was successful, the results will resemble this:
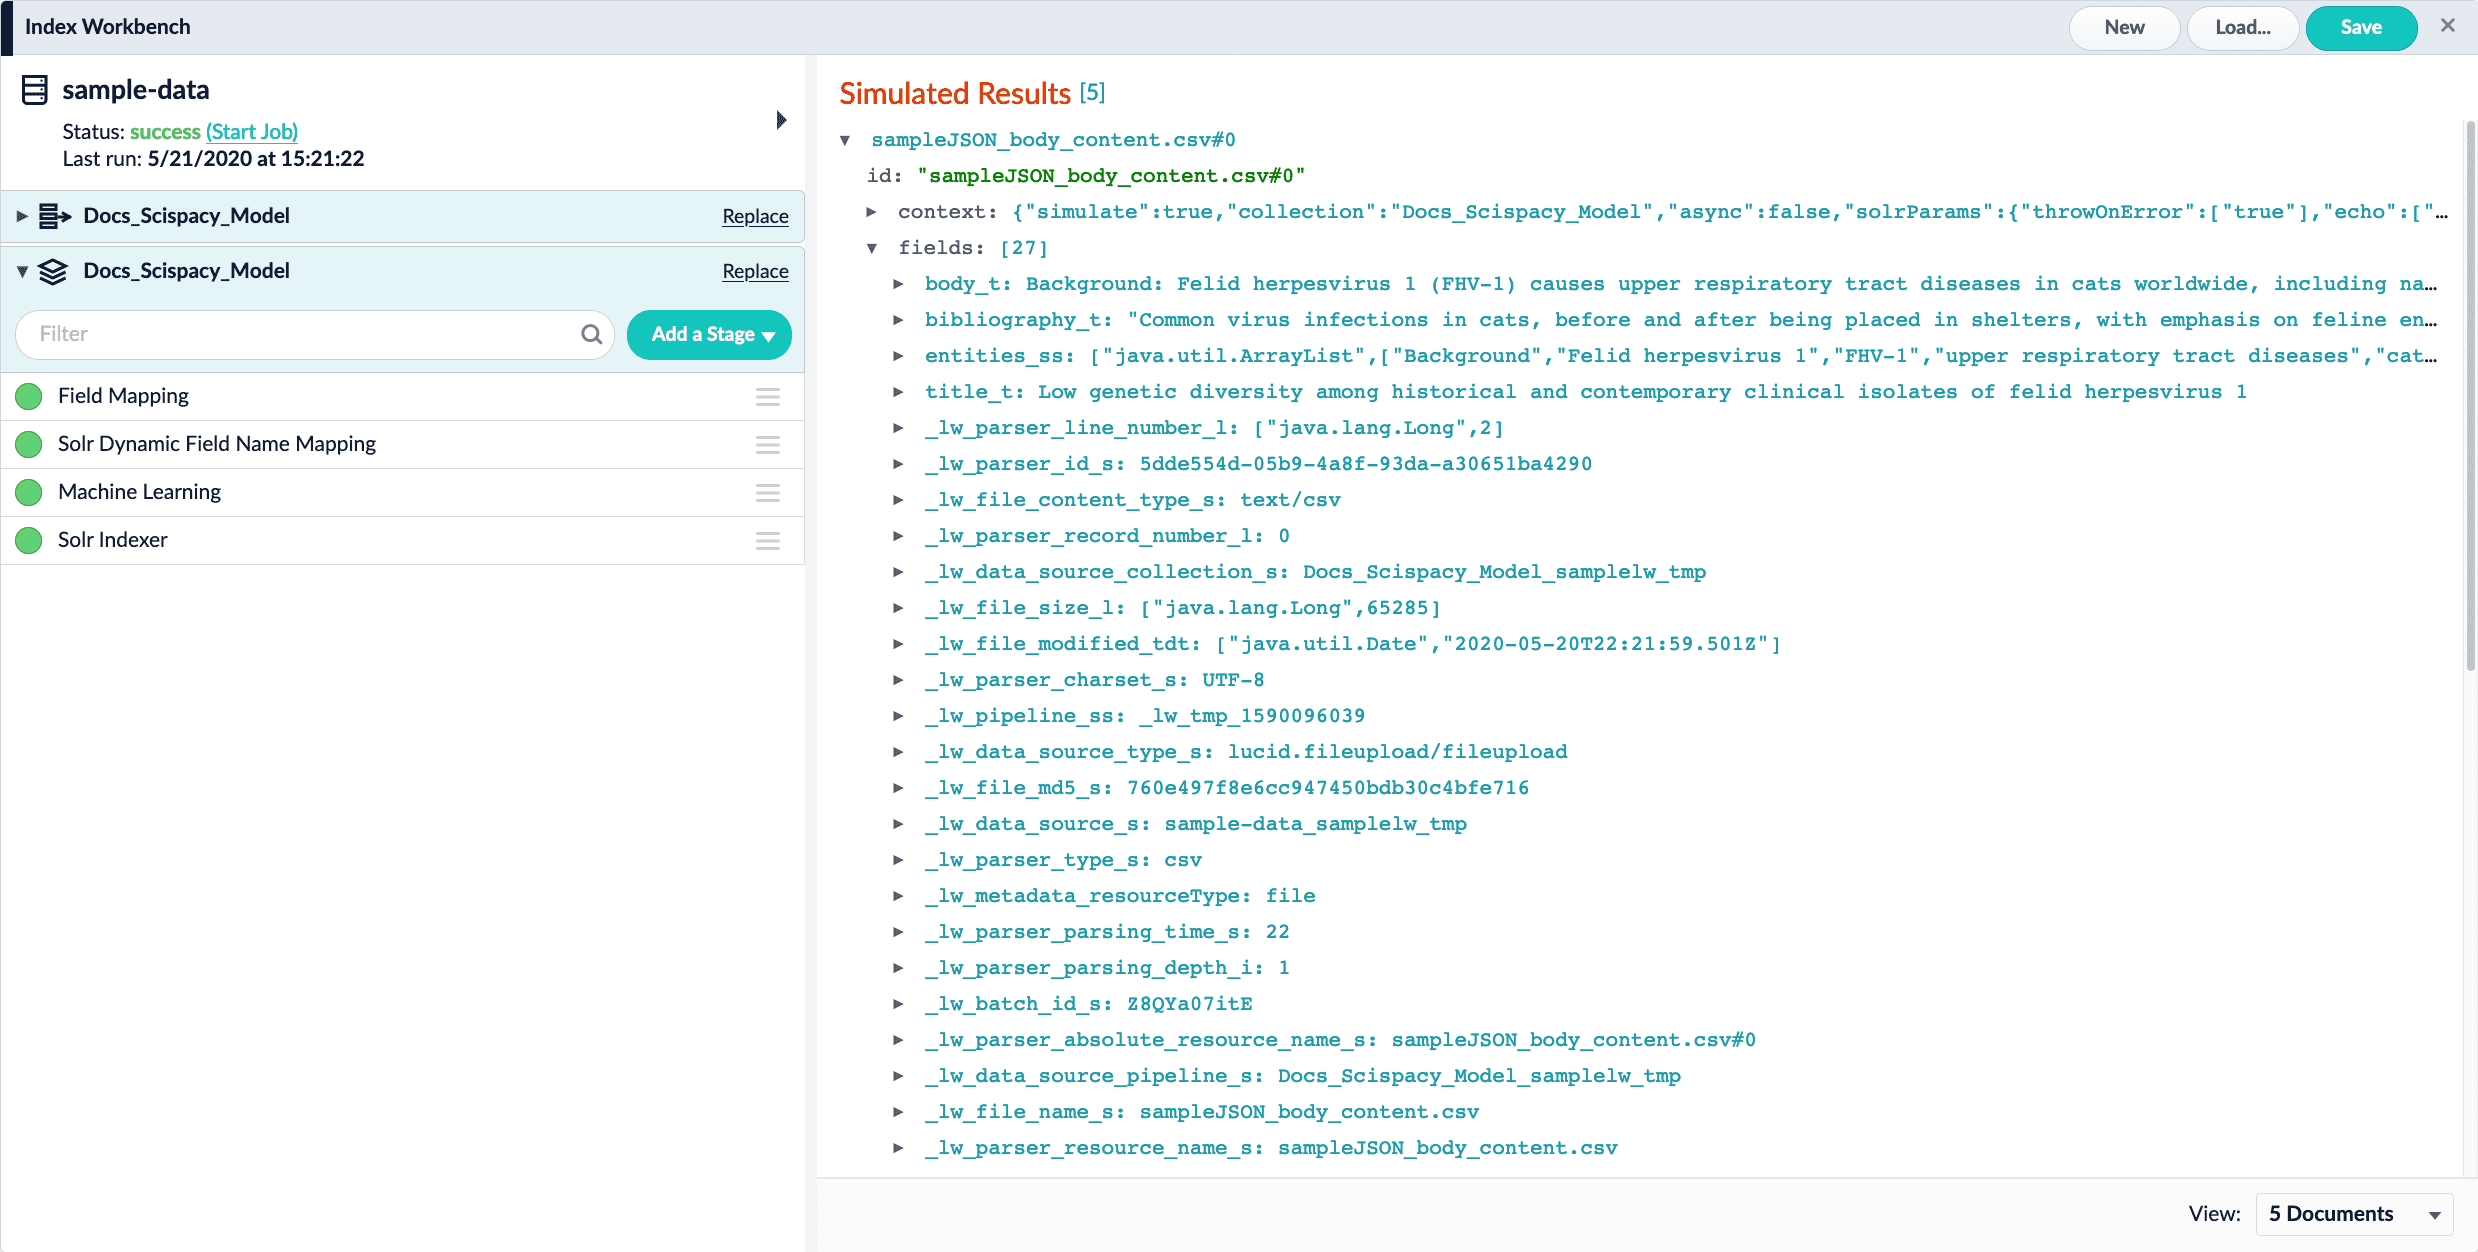
Set Up a Pre-Trained Cold Start Model for Smart Answers
Set Up a Pre-Trained Cold Start Model for Smart Answers
Lucidworks provides these pre-trained cold start models for Smart Answers:
qna-coldstart-large- this is a large model trained on variety of corpuses and tasks.qna-coldstart-multilingual- covers 16 languages. List of supported languages: Arabic, Chinese-simplified, Chinese-traditional, English, French, German, Italian, Japanese, Korean, Dutch, Polish, Portuguese, Spanish, Thai, Turkish, Russian.
Dimension size of vectors for both models is 512. You might need this information when creating collections in Milvus.
Deploy a pre-trained cold-start model into Lucidworks Search
The pre-trained cold-start models are deployed using a Lucidworks Search job called Create Seldon Core Model Deployment. This job downloads the selected pre-trained model and installs it in Lucidworks Search.- Navigate to Collections > Jobs.
- Select Add > Create Seldon Core Model Deployment.
- Enter a Job ID, such as
deploy-qna-coldstart-multilingualordeploy-qna-coldstart-large. - Enter the Model Name, one of the following:
qna-coldstart-multilingualqna-coldstart-large
- In the Docker Repository field, enter
lucidworks. - In the Image Name field, enter one of the following:
qna-coldstart-multilingual:v1.1qna-coldstart-large:v1.1
- Leave the Kubernetes Secret Name for Model Repo field empty.
- In the Output Column Names for Model field, enter one of the following:
qna-coldstart-multilingual:[vector]qna-coldstart-large:[vector, compressed_vector]
- Click Save.
- Click Run > Start to start the deployment job.
Next steps
- Evaluate a Smart Answers Query Pipeline